Dell PowerEdge 7150 Rack Installation Guide - Page 13
Removing the Doors From the Rack, Marking the Rack, Dell PowerEdge 4210 Rack Installation Guide
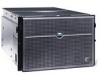 |
View all Dell PowerEdge 7150 manuals
Add to My Manuals
Save this manual to your list of manuals |
Page 13 highlights
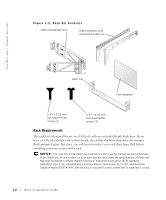
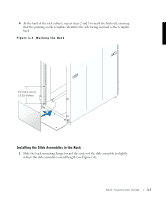
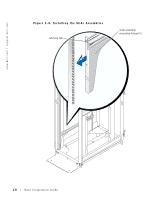
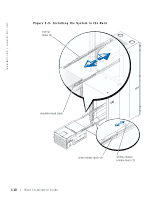
Removing the Doors From the Rack You must remove the doors from the rack to provide access to the interior of the rack and to prevent damage to the doors while installing the kit. If you are installing the rack kit in a PowerEdge™ 4210 rack cabinet, see the procedures contained in the Dell PowerEdge 4210 Rack Installation Guide. For other Dell rack cabinets, see the documentation provided with the rack for instructions on removing rack doors. Marking the Rack NOTE: If the slide assemblies were preinstalled by Dell, skip this section. You must allow 7 units (U), or 31.1 centimeters (cm [12.25 inches]) of vertical space for each system you install in the rack. 1 Determine where you want to install the system in the rack. For more information on configuring a Dell rack, refer to the Dell Rack Advisor software available on the Dell Web site at http://www.dell.com. CAUTION: If you are installing more than one system, install the first system in the lowest possible position in the rack. If you intend to install more than one system in the rack, you must install the slide assemblies so that 7 U (31.1 cm or 12.25 inches) of vertical space are between the top of one slide assembly and the top of the next. In the Dell rack, the rails of the rack are marked either by small indentations in 1-U (4.44 cm or 1.75-inch) increments (see Figure 1-2) or, as in the PowerEdge 4210 rack, by numbered 1-U markings on both the outer and inner surfaces of the front and back vertical rails. Rack Installation Guide 1-5
-
 1
1 -
2
-
3
-
4
-
5
-
6
-
7
-
 8
8 -
 9
9 -
 10
10 -
 11
11 -
 12
12 -
 13
13 -
 14
14 -
 15
15 -
 16
16 -
 17
17 -
 18
18 -
19
-
20
-
21
-
22
-
23
-
24
 |
 |