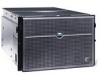
Dell PowerEdge 7150 Rack Installation Guide - Page 21
Installing the Cable-Management Arm, User's Guide, Dell PowerEdge 4210 Rack Installation Guide
 |
View all Dell PowerEdge 7150 manuals
Add to My Manuals
Save this manual to your list of manuals |
Page 21 highlights
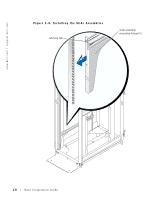
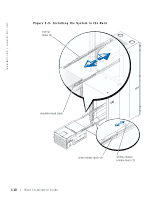
Installing the Cable-Management Arm NOTE: The cable management arm is reversible. This procedure describes installing the cable-management arm on the right side of the rack's vertical rail and on the right side of the back of the chassis, as viewed from the back. The steps are identical for installing the cable-management arm on the left side. 1 Attach the end of the cable-management arm to the cable tray (see Figure 1-6). Align the large tab on the end of the hinge arm with the slot on the side of the cable tray and secure the arm with the captive thumbscrew. 2 Attach the free end of the cable-management arm to the vertical rail (see Figure 1-6). Use the captive thumbscrew to attach the cable management arm through the vertical rail and into the threaded hole on the back of the slide assembly. 3 Retract and lock the upper support rod and place the lower support rod in the fully extended position. 4 Install the cables. For details on connecting the cables to the system, see the system's User's Guide. 5 Route the cables along the cable-management arm and secure them with the Velcro straps attached to the cable-management arm. 6 Slide the system in and out of the rack to verify that the cables are routed correctly. Make sure that the cables are not pinched in the cable-management arm joints. Replacing the Rack Doors If you have a Dell PowerEdge 4210 rack, see the procedures contained in the Dell PowerEdge 4210 Rack Installation Guide. For other Dell rack cabinets, see the documentation provided with the rack for instructions on replacing the rack doors. Rack Installation Guide 1-13
-
 1
1 -
2
-
3
-
4
-
5
-
6
-
7
-
8
-
9
-
10
-
11
-
12
-
13
-
14
-
15
-
 16
16 -
 17
17 -
 18
18 -
 19
19 -
 20
20 -
 21
21 -
 22
22 -
 23
23 -
 24
24
 |
 |