Dell PowerEdge R940 Deploying the 385TB Data Warehouse Fast Track Reference Ar - Page 11
Con PowerEdge R940 server, 5.1 Update firmware, 5.2 Con System BIOS
 |
View all Dell PowerEdge R940 manuals
Add to My Manuals
Save this manual to your list of manuals |
Page 11 highlights
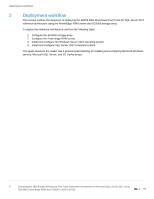
Configure PowerEdge R940 server 5 Configure PowerEdge R940 server 5.1 5.2 Update firmware The firmware update feature of the Lifecycle Controller can be used to update the firmware on the server. The Lifecycle Controller is accessible during the server boot cycle. To update the firmware using the Lifecycle Controller, perform the following steps: 1. Reboot the server and press F10 when prompted to enter the Lifecycle Controller. 2. On the left-hand side of the screen, click Firmware Update. 3. Click Launch Firmware Update. 4. On the Select Update Repository screen, leave FTP Server selected and click Next. 5. On the Enter Access Details screen, under Proxy Settings, uncheck Enable Settings and click Next. 6. On the Select Updates screen, available updates will have a check mark next to the component name. After verifying the list of selected updates, click Apply. This will apply the updates and reboot the server. 7. After rebooting, the server will enter the Lifecycle Controller. In some cases, it may be necessary to repeat this process until all updates have been applied. 8. To exit the Lifecycle Controller, click Exit in the upper right-hand corner of the screen. 9. In the Confirmation dialog box, click Yes. The server will reboot. Configure System BIOS The BIOS can be configured using System Setup, which is accessible during the server boot cycle. To configure the BIOS using System Setup, perform the following steps: 1. Reboot the server and press F2 when prompted to enter System Setup. 2. On the System Setup main menu, click System BIOS. 3. Set the system profile to Performance: a. Click System Profile Settings. b. In the System Profile drop-down list, select Performance. c. Click Back to exit System Profile Settings. 4. Enable Hyper Threading: a. Click Processor Settings. b. For the Logical Processor option, select Enabled. c. Click Back to exit Processor Settings. 5. Click Finish to exit System BIOS. 6. Click Finish to exit System Setup. 7. On the Confirm Exit dialog box, click Yes. The server will reboot. 11 Deploying the 385TB Data Warehouse Fast Track Reference Architecture for Microsoft SQL Server 2017 using Dell EMC PowerEdge R940 and SC9000 | 4033-CD-SQL
-
 1
1 -
2
-
3
-
4
-
5
-
 6
6 -
 7
7 -
 8
8 -
 9
9 -
 10
10 -
 11
11 -
 12
12 -
 13
13 -
 14
14 -
 15
15 -
 16
16 -
17
-
18
-
19
-
20
-
21
-
22
-
23
-
24
-
25
 |
 |
