Dell PowerEdge R940 Deploying the 385TB Data Warehouse Fast Track Reference Ar - Page 17
Change the optical drive letter (optional), 6.2.15 Con the Windows Firewall
 |
View all Dell PowerEdge R940 manuals
Add to My Manuals
Save this manual to your list of manuals |
Page 17 highlights
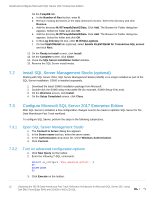
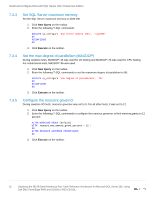
Install and configure Microsoft Windows Server 2016 6.2.14 Change the optical drive letter (optional) Change the drive letter for the optical drive to Z: 1. Open Disk Management. 2. Right-click the optical drive in the list of disks in the lower pane of the center of the screen and select Change Drive Letter and Paths. The Change Drive Letter and Paths dialog box appears. 3. Click Change. The Change Drive Letter or Path dialog box appears. 4. Select Z from the drop-down list of drive letters and click OK. 5. A Disk Management dialog box will appear asking if you want to continue. Click Yes. 6. Close the Computer Management window. 6.2.15 Configure the Windows Firewall Because security requirements can vary significantly from site to site, the configuration of the firewall is not included in this document. Using default settings, the Windows firewall may interfere with RDP connections and with connections to SQL Server. During validation of the solution, the Windows firewall was disabled. 6.3 Configure the Windows volumes This section describes the steps required to configure the SC Series volumes for use by Windows. 6.3.1 Change the operating system definition in the SC Series array The SC Series server object will need to be changed to use the MPIO version of the operating system definition. This will allow volume mappings to use all available paths. To change the operating system definition of the server object, perform the following steps: 1. Open the DSM client and connect to the SC Series array. 2. Click the Storage tab. 3. Expand the server folder that contains the server object. 4. Right-click the server and select Edit Settings. The Edit Server Settings dialog box appears. 5. In the Operating System drop-down list, select Windows Server 2016 MPIO and click OK. 17 Deploying the 385TB Data Warehouse Fast Track Reference Architecture for Microsoft SQL Server 2017 using Dell EMC PowerEdge R940 and SC9000 | 4033-CD-SQL
-
 1
1 -
2
-
3
-
4
-
5
-
6
-
7
-
8
-
9
-
10
-
11
-
 12
12 -
 13
13 -
 14
14 -
 15
15 -
 16
16 -
 17
17 -
 18
18 -
 19
19 -
 20
20 -
 21
21 -
 22
22 -
23
-
24
-
25
 |
 |
