Dell PowerVault 122T LTO Dell PowerVault 122T SDLT 320 Autoloader User's Guide - Page 18
Autoloader Error Codes
 |
View all Dell PowerVault 122T LTO manuals
Add to My Manuals
Save this manual to your list of manuals |
Page 18 highlights
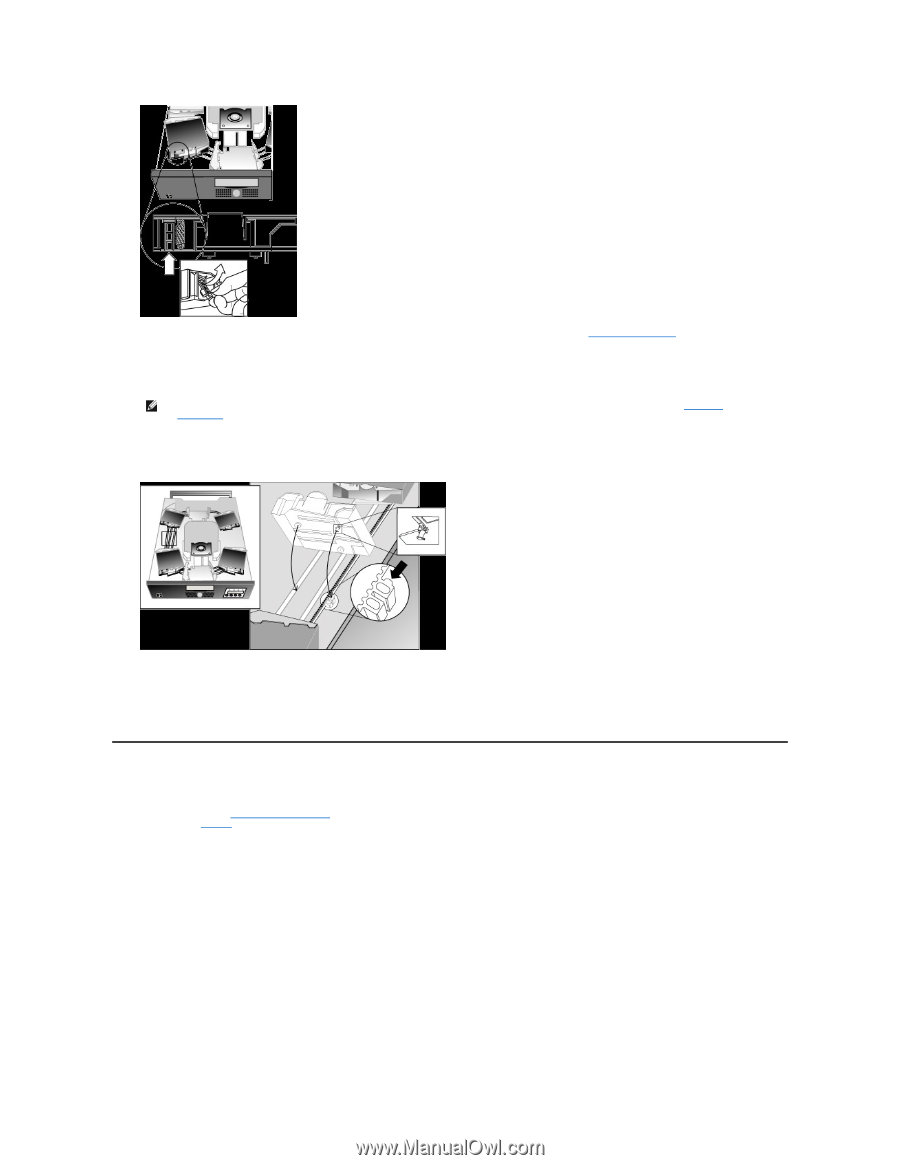
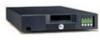
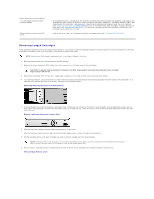
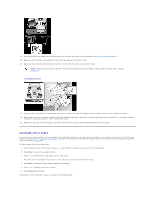
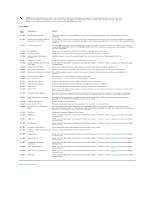
10. After removing the cartridges from the desired carriers, reinstall each carrier on the autoloader belt (see "Installing the Carrier"). 11. Make sure that the rollers on the bottom of the carrier are aligned in the carrier tracks. 12. Make sure that the belt post beneath each carrier is inserted into the proper autoloader belt loop. NOTE: There are unused loops on the belt. The proper belt loops have an extra bump on the outside of the loop (see "Installing the Carrier"). Installing the Carrier 13. Insert the peg on the bottom of the cartridge carrier into the slot in the belt, then gently turn the cartridge carrier in place to lock it in the belt. 14. Ensure that the carrier is properly installed on the belt by gently pressing on the top of the carrier and sliding it back and forth. If it is properly attached to the belt, it should not move. If it does, reinstall the carrier. 15. Replace the top cover of the autoloader, and then reinstall the cover screws and mounting brackets (if rack mounted). Autoloader Error Codes If an error occurs during operation of the autoloader, the autoloader stops the current operation and displays an error code on the top line of the LCD screen. Unless otherwise noted in "Autoloader Error Codes," attempt to resolve the error by resetting or power cycling the autoloader and retrying the last operation. If the error persists, contact Dell. To view the error log, follow these steps: 1. From the Home screen or main menu, press + or - until Information appears on the top line of the LCD screen. 2. Press Enter to access the available options. 3. Press + or - until View Error Log appears on the LCD screen. The LCD screen also displays the quantity of errors and events currently stored in the error log. 4. Press Enter to access the most recently logged error message. 5. Press + or - to display each error in the log. 6. Press Cancel when finished. A description of each of the error codes is provided in the following table:
-
 1
1 -
2
-
3
-
4
-
5
-
6
-
7
-
8
-
9
-
10
-
11
-
12
-
 13
13 -
 14
14 -
 15
15 -
 16
16 -
 17
17 -
 18
18 -
 19
19 -
 20
20 -
 21
21 -
 22
22 -
 23
23 -
24
-
25
-
26
-
27
-
28
-
29
-
30
-
31
-
32
-
33
-
34
-
35
-
36
-
37
-
38
-
39
 |
 |