Dell Precision 420 System Documentation Update (Memory Upgrade) - Page 12
Removing a RIMM, Removing a RIMM
 |
View all Dell Precision 420 manuals
Add to My Manuals
Save this manual to your list of manuals |
Page 12 highlights
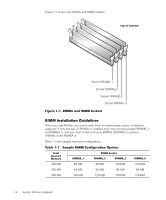
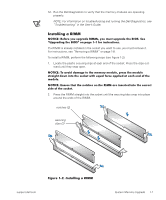
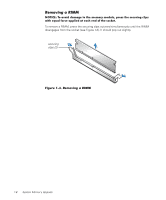
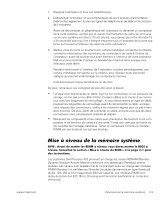
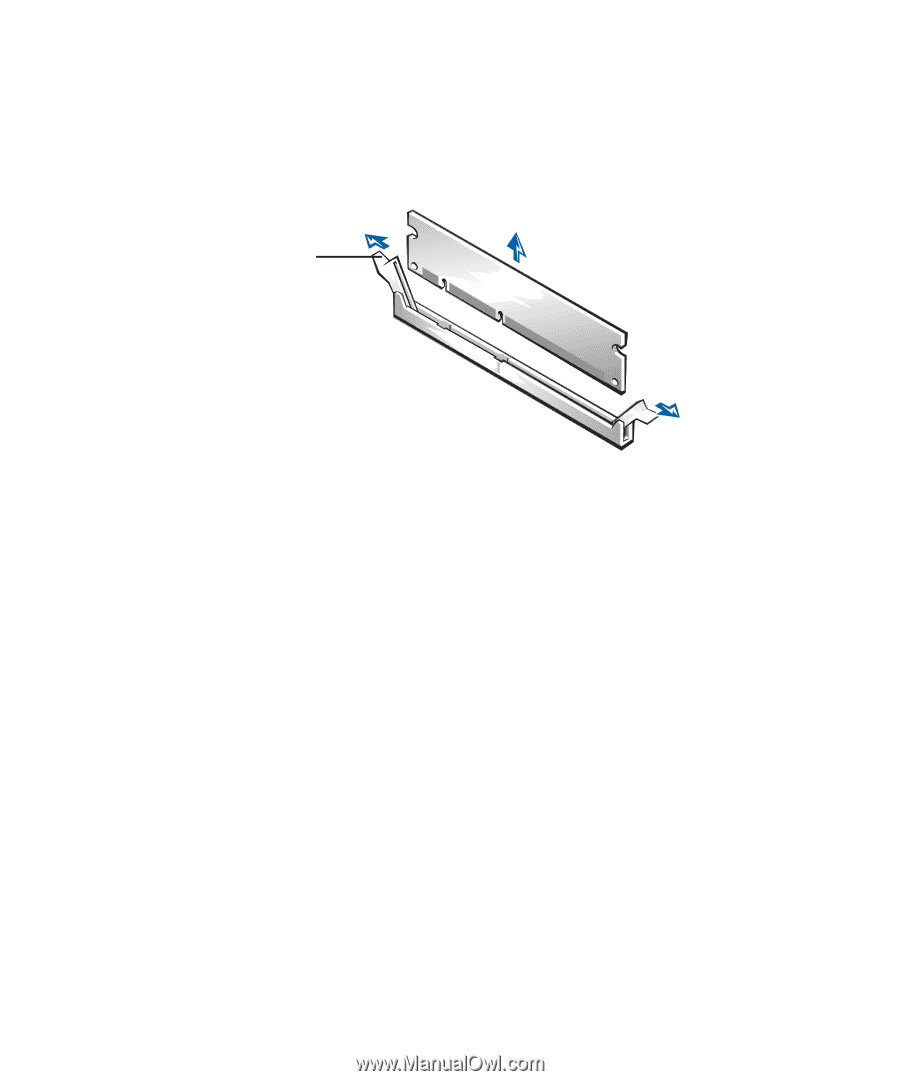
Removing a RIMM NOTICE: To avoid damage to the memory module, press the securing clips with equal force applied at each end of the socket. To remove a RIMM, press the securing clips outward simultaneously until the RIMM disengages from the socket (see Figure 1-3). It should pop out slightly. securing clips (2) Figure 1-3. Removing a RIMM 1-8 System Memory Upgrade
-
 1
1 -
2
-
3
-
4
-
5
-
6
-
 7
7 -
 8
8 -
 9
9 -
 10
10 -
 11
11 -
 12
12 -
 13
13 -
 14
14 -
 15
15 -
 16
16 -
 17
17 -
18
-
19
-
20
-
21
-
22
-
23
-
24
-
25
-
26
-
27
-
28
-
29
-
30
-
31
-
32
-
33
-
34
-
35
-
36
-
37
-
38
-
39
-
40
-
41
-
42
 |
 |
1-8
System Memory Upgrade
Removing a RIMM
NOTICE: To avoid damage to the memory module, press the securing clips
with equal force applied at each end of the socket.
To remove a RIMM, press the securing clips outward simultaneously until the RIMM
disengages from the socket (see Figure 1-3). It should pop out slightly.
Figure 1-3. Removing a RIMM
securing
clips (2)