Dell S2810dn Smart Dell Smart Printer Users Guide - Page 200
Printer Setup, Installing a Printer Driver Using the Add Printer Wizard, Add Roles and Features Wizard
 |
View all Dell S2810dn Smart manuals
Add to My Manuals
Save this manual to your list of manuals |
Page 200 highlights
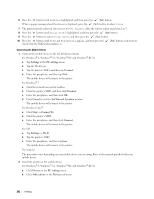
4 Check the Print Server check box, and then click Next. 5 Click Install. For Windows Server® 2008 R2: 1 Click Start Administrative Tools Server Manager. 2 Select Add Roles from the Action menu. 3 Check the Print and Document Services check box on the Server Roles window in the Add Roles Wizard, and then click Next. 4 Click Next. 5 Check the Print Server check box, and then click Next. 6 Click Install. For Windows Server® 2012/Windows Server® 2012 R2: 1 Click Server Manager of the Start screen. 2 Select Add Roles and Features from the Manage menu. 3 Click Next on the Before You Begin window Select installation type on the Installation Type window Select destination server on the Server Selection window in the Add Roles and Features Wizard. 4 Check the Print and Document Services check box on the Server Roles window, and then click Next. 5 Select features on the Features window Confirm installation selections on the Confirmation window. 6 Click Install. Printer Setup You can install your new printer on the network using the Software and Documentation disc that shipped with your printer, or using the Add Printer wizard on Microsoft® Windows®. Installing a Printer Driver Using the Add Printer Wizard 1 Click Start Devices and Printers (Start Control Panel Hardware and Sound Printers for Windows Vista® and Windows Server® 2008). For Windows® 8, Windows® 8.1, Windows Server® 2012, and Windows Server® 2012 R2: On the Desktop screen, right-click the bottom left corner of the screen, and then click Control Panel Hardware and Sound (Hardware for Windows Server® 2012/Windows Server® 2012 R2) Devices and Printers. 2 Click Add a printer to launch the Add Printer wizard. 3 Select Add a network, wireless or Bluetooth printer. 4 In the list of available printers, select the one you want to use, and then click Next. NOTE: In the list of available printers, the Web Services on Devices (WSD) printer is displayed in the form of http://IP address/ws/. NOTE: If no Web Services on Devices (WSD) printer is displayed in the list, enter the printer's IP address manually to create a Web Services on Devices (WSD) printer. To enter the printer's IP address manually, follow the instructions below. For Windows Server® 2008 R2, to create a Web Services on Devices (WSD) printer, you must be a member of Administrators group. 1. Click The printer that I want isn't listed. 2. Select Add a printer using a TCP/IP address or hostname and click Next. 3. Select Web Services Device from Device type. 4. Enter the printer's IP address in the Hostname or IP address text box and click Next. 200 Printing
-
 1
1 -
2
-
3
-
4
-
5
-
6
-
7
-
8
-
9
-
10
-
11
-
12
-
13
-
14
-
15
-
16
-
17
-
18
-
19
-
20
-
21
-
22
-
23
-
24
-
25
-
26
-
27
-
28
-
29
-
30
-
31
-
32
-
33
-
34
-
35
-
36
-
37
-
38
-
39
-
40
-
41
-
42
-
43
-
44
-
45
-
46
-
47
-
48
-
49
-
50
-
51
-
52
-
53
-
54
-
55
-
56
-
57
-
58
-
59
-
60
-
61
-
62
-
63
-
64
-
65
-
66
-
67
-
68
-
69
-
70
-
71
-
72
-
73
-
74
-
75
-
76
-
77
-
78
-
79
-
80
-
81
-
82
-
83
-
84
-
85
-
86
-
87
-
88
-
89
-
90
-
91
-
92
-
93
-
94
-
95
-
96
-
97
-
98
-
99
-
100
-
101
-
102
-
103
-
104
-
105
-
106
-
107
-
108
-
109
-
110
-
111
-
112
-
113
-
114
-
115
-
116
-
117
-
118
-
119
-
120
-
121
-
122
-
123
-
124
-
125
-
126
-
127
-
128
-
129
-
130
-
131
-
132
-
133
-
134
-
135
-
136
-
137
-
138
-
139
-
140
-
141
-
142
-
143
-
144
-
145
-
146
-
147
-
148
-
149
-
150
-
151
-
152
-
153
-
154
-
155
-
156
-
157
-
158
-
159
-
160
-
161
-
162
-
163
-
164
-
165
-
166
-
167
-
168
-
169
-
170
-
171
-
172
-
173
-
174
-
175
-
176
-
177
-
178
-
179
-
180
-
181
-
182
-
183
-
184
-
185
-
186
-
187
-
188
-
189
-
190
-
191
-
192
-
193
-
194
-
 195
195 -
 196
196 -
 197
197 -
 198
198 -
 199
199 -
 200
200 -
 201
201 -
 202
202 -
 203
203 -
 204
204 -
 205
205 -
206
-
207
-
208
-
209
-
210
-
211
-
212
-
213
-
214
-
215
-
216
-
217
-
218
-
219
-
220
-
221
-
222
-
223
-
224
-
225
-
226
-
227
-
228
-
229
-
230
-
231
-
232
-
233
-
234
-
235
-
236
-
237
-
238
-
239
-
240
-
241
-
242
-
243
-
244
-
245
-
246
-
247
-
248
-
249
-
250
-
251
-
252
-
253
-
254
-
255
-
256
-
257
-
258
-
259
-
260
-
261
-
262
-
263
-
264
-
265
-
266
-
267
-
268
-
269
-
270
-
271
-
272
-
273
-
274
-
275
-
276
-
277
-
278
-
279
-
280
-
281
-
282
-
283
-
284
-
285
-
286
-
287
-
288
-
289
-
290
-
291
-
292
-
293
-
294
-
295
-
296
-
297
-
298
-
299
-
300
-
301
-
302
-
303
-
304
-
305
-
306
-
307
-
308
-
309
-
310
-
311
-
312
-
313
-
314
-
315
-
316
 |
 |
