Dell S4148U-ON EMC PowerSwitch S4100–ON Series Installation Guide M - Page 32
S4100-ON Series installation, Establish a connection to the switch CLI.
 |
View all Dell S4148U-ON manuals
Add to My Manuals
Save this manual to your list of manuals |
Page 32 highlights
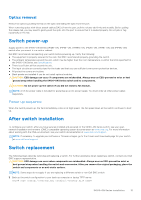
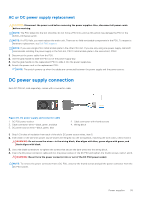
2. Disconnect the power source. 3. Label and remove all cables. 4. Remove the switch from the rack. At the same time, press in the two side-release bars on the switch and slide the switch forward. If you are using the fan trays or PSUs in the replacement switch, remove them from the switch. 5. Unpack the new switch. For more information, see Unpack. 6. Install the new switch in your rack or cabinet. For detailed installation instructions, see S4100F-ON series installation. If you are using the fan trays or PSUs from the removed switch, reinsert them in the replacement switch. 7. Connect all the cables. 8. Power on the switch. For more information, see Switch power up. 9. Establish a connection to the switch CLI. 10. Confirm that the software version of the replacement switch is the same as the previously installed switch. show version If the software versions do not match, upgrade the replacement switch software using the procedure included with the firmware download. 11. Copy the backed-up switch configuration to the new switch. copy tftp://hostip/filepath running-config 32 S4100-ON Series installation
-
 1
1 -
2
-
3
-
4
-
5
-
6
-
7
-
8
-
9
-
10
-
11
-
12
-
13
-
14
-
15
-
16
-
17
-
18
-
19
-
20
-
21
-
22
-
23
-
24
-
25
-
26
-
 27
27 -
 28
28 -
 29
29 -
 30
30 -
 31
31 -
 32
32 -
 33
33 -
 34
34 -
 35
35 -
 36
36 -
 37
37 -
38
-
39
-
40
-
41
-
42
-
43
-
44
-
45
-
46
-
47
-
48
-
49
 |
 |
