Dell S4148U-ON EMC Networking ONIE Quick Start Guide - Page 17
command. The USB
 |
View all Dell S4148U-ON manuals
Add to My Manuals
Save this manual to your list of manuals |
Page 17 highlights
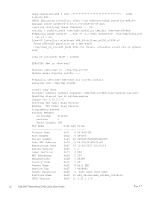
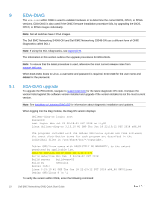
7.2.2 USB The ONIE update can be manually installed using a USB drive. Note: Before you continue, verify that the USB drive supports a FAT32 or EXT2 file system. 1. Plug the USB drive into the USB port on the device. 2. Enter the following command to create a USB mount location on the system: ONIE:/ # mkdir /mnt/media 3. Validate the specific file path for the USB drive on the switch with the blkid command. The USB drive is highlighted in the command output below. ONIE:/ # blkid /dev/sda4: UUID="c4e653fd-b843-452f-9c9d-64429a3f945e" /dev/sda3: LABEL="EDA-DIAG" UUID="bc182a2d-aa35-49b2-8510-08dd956dd057" /dev/sda2: LABEL="ONIE-BOOT" UUID="17760947-e561-4eb7-87b4-4d0ad9254c3a" /dev/sdb1: LABEL="THUMBDRIVE" UUID="14A6-FEE0" /dev/sda1: LABEL="EFI System" UUID="90AE-9B38" 4. Mount the USB drive. The vfat option is used for FAT32 formatted drives. ONIE:/ # mount -t vfat /dev/sdb1 /mnt/media 5. Enter the following command to install the software from the USB drive. Note: Replace /mnt/media with the file path where the USB partition is mounted. ONIE:/ # onie-nos-install /mnt/media/ 17 Dell EMC Networking ONIE Quick Start Guide
-
 1
1 -
2
-
3
-
4
-
5
-
6
-
7
-
8
-
9
-
10
-
11
-
 12
12 -
 13
13 -
 14
14 -
 15
15 -
 16
16 -
 17
17 -
 18
18 -
 19
19 -
 20
20 -
 21
21 -
 22
22 -
23
-
24
-
25
-
26
-
27
-
28
-
29
-
30
-
31
-
32
-
33
-
34
-
35
-
36
-
37
-
38
-
39
-
40
 |
 |
