Dell S6000 Dell Networking System Getting Started Guide - Page 17
Installation, Unpacking the Switch, Package Contents, Unpacking Steps
 |
View all Dell S6000 manuals
Add to My Manuals
Save this manual to your list of manuals |
Page 17 highlights
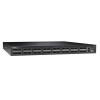
4 Installation Unpacking the Switch This section describes the package contents and the steps to unpack the S6000 switch. Package Contents When unpacking each switch, make sure that the following items are included: • One S6000 switch • One RJ-45 to DB-9 female cable • Two sets of rail kits (no tools required) • Two PSUs • One AC power cord (country/region specific) • Getting Started Guide • Safety and Regulatory Information • Warranty and Support Information • Software License Agreement Unpacking Steps NOTE: Before unpacking the switch, inspect the container and immediately report any evidence of damage. Step Task 1 Place the container on a clean, flat surface and cut all straps securing the container. 2 Open the container or remove the container top. 3 Carefully remove the switch from the container and place it on a secure and clean surface. 4 Remove all packing material. 5 Inspect the product and accessories for damage. Installation 13
-
 1
1 -
2
-
3
-
4
-
5
-
6
-
7
-
8
-
9
-
10
-
11
-
 12
12 -
 13
13 -
 14
14 -
 15
15 -
 16
16 -
 17
17 -
 18
18 -
 19
19 -
 20
20 -
 21
21 -
 22
22 -
23
-
24
-
25
-
26
-
27
-
28
-
29
-
30
-
31
-
32
-
33
-
34
-
35
-
36
-
37
 |
 |
