Dell XPS /Dimension Owner's Manual - Page 80
Before You Begin, Recommended Tools
 |
View all Dell XPS /Dimension manuals
Add to My Manuals
Save this manual to your list of manuals |
Page 80 highlights
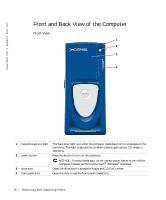
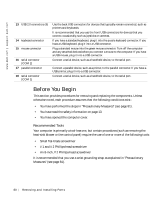
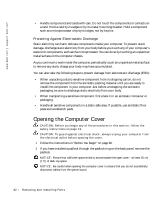
www.dell.com | support.dell.com 13 USB 2.0 connectors (6) 14 keyboard connector 15 mouse connector 16 serial connector (COM 2) 17 parallel connector 18 serial connector (COM 1) Use the back USB connectors for devices that typically remain connected, such as printers and keyboards. It is recommended that you use the front USB connectors for devices that you connect occasionally, such as joysticks or cameras. If you have a standard keyboard, plug it into the purple keyboard connector. If you have a USB keyboard, plug it into a USB connector. Plug a standard mouse into the green mouse connector. Turn off the computer and any attached devices before you connect a mouse to the computer. If you have a USB mouse, plug it into a USB connector. Connect a serial device, such as a handheld device, to the serial port. Connect a parallel device, such as a printer, to the parallel connector. If you have a USB printer, plug it into a USB connector. Connect a serial device, such as a handheld device, to the serial port. Before You Begin This section provides procedures for removing and replacing the components. Unless otherwise noted, each procedure assumes that the following conditions exist: • You have performed the steps in "Precautionary Measures" (see page 81). • You have read the safety information on page 13. • You have opened the computer cover. Recommended Tools Your computer is primarily a tool-less one, but certain procedures (such as removing the heat-sink blower or the control panel) require the use of one or more of the following tools: • Small flat-blade screwdriver • #1 and #2 Phillips-head screwdriver • An 8-inch, #2 Phillips-head screwdriver It is recommended that you use a wrist grounding strap as explained in "Precautionary Measures" (see page 81). 80 Re m ov i n g a n d I ns t al l i n g Pa r t s
-
 1
1 -
2
-
3
-
4
-
5
-
6
-
7
-
8
-
9
-
10
-
11
-
12
-
13
-
14
-
15
-
16
-
17
-
18
-
19
-
20
-
21
-
22
-
23
-
24
-
25
-
26
-
27
-
28
-
29
-
30
-
31
-
32
-
33
-
34
-
35
-
36
-
37
-
38
-
39
-
40
-
41
-
42
-
43
-
44
-
45
-
46
-
47
-
48
-
49
-
50
-
51
-
52
-
53
-
54
-
55
-
56
-
57
-
58
-
59
-
60
-
61
-
62
-
63
-
64
-
65
-
66
-
67
-
68
-
69
-
70
-
71
-
72
-
73
-
74
-
 75
75 -
 76
76 -
 77
77 -
 78
78 -
 79
79 -
 80
80 -
 81
81 -
 82
82 -
 83
83 -
 84
84 -
 85
85 -
86
-
87
-
88
-
89
-
90
-
91
-
92
-
93
-
94
-
95
-
96
-
97
-
98
-
99
-
100
-
101
-
102
-
103
-
104
-
105
-
106
-
107
-
108
-
109
-
110
-
111
-
112
-
113
-
114
-
115
-
116
-
117
-
118
-
119
-
120
-
121
-
122
-
123
-
124
-
125
-
126
-
127
-
128
-
129
-
130
-
131
-
132
-
133
-
134
-
135
-
136
-
137
-
138
-
139
-
140
-
141
-
142
-
143
-
144
-
145
-
146
-
147
-
148
 |
 |