Dell XPS 710 H2C Owner's Manual - Page 47
E-Mail, Modem, and Internet Problems
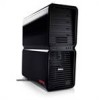 |
View all Dell XPS 710 H2C manuals
Add to My Manuals
Save this manual to your list of manuals |
Page 47 highlights
book.book Page 47 Friday, October 27, 2006 4:02 PM Hard drive problems RUN CHECK DISK - 1 Click Start, then click My Computer. 2 Right-click Local Disk C:. 3 Click Properties. 4 Click the Tools tab. 5 Under Error-checking, click Check Now. 6 Click Scan for and attempt recovery of bad sectors. 7 Click Start. E-Mail, Modem, and Internet Problems CAUTION: Before you begin any of the procedures in this section, follow the safety instructions in the Product Information Guide. NOTE: Connect the modem to an analog telephone jack only. The modem does not operate while it is connected to a digital telephone network. NOTE: Do not plug a telephone cable into the network adapter connector (see "Back I/O Connectors" on page 17). C H E C K T H E M I C R O S O F T O U T L O O K ® E X P R E S S S E C U R I T Y S E T T I N G S - If you cannot open your e-mail attachments: 1 In Outlook Express, click Tools, click Options, and then click Security. 2 Click Do not allow attachments to remove the checkmark, as needed. CHECK THE TELEPHONE LINE CONNECTION - CHECK THE TELEPHONE JACK - CONNECT THE MODEM DIRECTLY TO THE TELEPHONE WALL JACK - USE A DIFFERENT TELEPHONE LINE - • Verify that the telephone line is connected to the jack on the modem (the jack has either a green label or a connector-shaped icon next to it). • Ensure that you hear a click when you insert the telephone line connector into the modem. • Disconnect the telephone line from the modem and connect it to a telephone, then listen for a dial tone. • If you have other telephone devices sharing the line, such as an answering machine, fax machine, surge protector, or line splitter, bypass them and use the telephone to connect the modem directly to the telephone wall jack. If you are using a line that is 3 m (10 ft) or more in length, try a shorter one. Solving Problems 47
-
 1
1 -
2
-
3
-
4
-
5
-
6
-
7
-
8
-
9
-
10
-
11
-
12
-
13
-
14
-
15
-
16
-
17
-
18
-
19
-
20
-
21
-
22
-
23
-
24
-
25
-
26
-
27
-
28
-
29
-
30
-
31
-
32
-
33
-
34
-
35
-
36
-
37
-
38
-
39
-
40
-
41
-
 42
42 -
 43
43 -
 44
44 -
 45
45 -
 46
46 -
 47
47 -
 48
48 -
 49
49 -
 50
50 -
 51
51 -
 52
52 -
53
-
54
-
55
-
56
-
57
-
58
-
59
-
60
-
61
-
62
-
63
-
64
-
65
-
66
-
67
-
68
-
69
-
70
-
71
-
72
-
73
-
74
-
75
-
76
-
77
-
78
-
79
-
80
-
81
-
82
-
83
-
84
-
85
-
86
-
87
-
88
-
89
-
90
-
91
-
92
-
93
-
94
-
95
-
96
-
97
-
98
-
99
-
100
-
101
-
102
-
103
-
104
-
105
-
106
-
107
-
108
-
109
-
110
-
111
-
112
-
113
-
114
-
115
-
116
-
117
-
118
-
119
-
120
-
121
-
122
-
123
-
124
-
125
-
126
-
127
-
128
-
129
-
130
-
131
-
132
-
133
-
134
-
135
-
136
-
137
-
138
-
139
-
140
-
141
-
142
-
143
-
144
-
145
-
146
-
147
-
148
-
149
-
150
-
151
-
152
-
153
-
154
-
155
-
156
-
157
-
158
-
159
-
160
-
161
-
162
-
163
-
164
-
165
-
166
-
167
-
168
-
169
-
170
-
171
-
172
-
173
-
174
-
175
-
176
-
177
-
178
-
179
-
180
-
181
-
182
 |
 |
