Denon AVR-3801 Owners Manual - Page 46
Multi-source recording/playback
 |
View all Denon AVR-3801 manuals
Add to My Manuals
Save this manual to your list of manuals |
Page 46 highlights
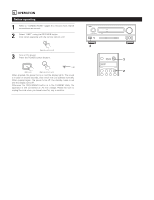
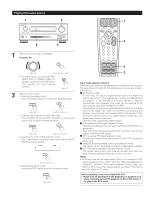
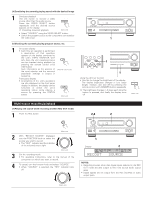
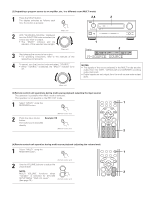
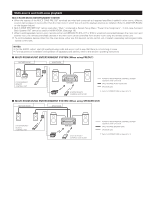
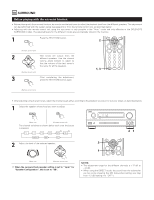
[4] Combining the currently playing sound with the desired image 1 Simulcast playback Use this switch to monitor a video source other than the audio source. Press the VIDEO SELECT button repeatedly until the desired source appears on the display. Cancelling simulcast playback. VIDEO SELECT (Main unit) • Select "SOURCE" using the VIDEO SELECT button. • Switch the program source to the component connected to the video input. [5] Checking the currently playing program source, etc. 1 On screen display • Each time an operation is performed, a description of that operation appears on the display connected to the unit's VIDEO MONITOR OUT jack. Also, the unit's operating status OSD can be checked during playback by pressing the remote control unit's OSD button. Such information as the position of (Remote control unit) the input selector and the surround parameter settings is output in sequence. Front panel display • Descriptions of the unit's operations are also displayed on the front panel display. In addition, the display can be switched to check the unit's operating status while playing a source by pressing the STATUS button. STATUS (Main unit) VCR DBS/CABLE VDP DVD DISPLAY SURR. PARA. SETUP TUNING MENU OSD RETURN A/B BAND MODE MEMORY 1 Using the dimmer function • Use this to change the brightness of the display. The display brightness changes in four steps (bright, medium, dim and off) by pressing the remote control unit's DIMMER button repeatedly. The brightness changes in 3 steps each time the button is pressed, and finally the display turns off. DIMMER (Main unit) Multi-source recording/playback [1] Playing one source while recording another (REC OUT mode) 1 Press the REC button. REC 2 With "RECOUT SOURCE" displayed, turn the FUNCTION knob to select the source you wish to record. • The "REC" indicator and the indicator of the selected source light. (Main unit) FUNCTION (Main unit) 3 Set the recording mode. • For operating instructions, refer to the manual of the component on which you want to record. 4 To cancel, turn the function knob and select "SOURCE". • When "SOURCE" is selected, the "REC" indicator turns off. FUNCTION Display NOTES: • Recording sources other than digital inputs selected in the REC OUT mode are also output to the multi source audio output jacks. • Digital signals are not output from the REC SOURCE or audio output jacks. (Main unit) 45
-
 1
1 -
2
-
3
-
4
-
5
-
6
-
7
-
8
-
9
-
10
-
11
-
12
-
13
-
14
-
15
-
16
-
17
-
18
-
19
-
20
-
21
-
22
-
23
-
24
-
25
-
26
-
27
-
28
-
29
-
30
-
31
-
32
-
33
-
34
-
35
-
36
-
37
-
38
-
39
-
40
-
 41
41 -
 42
42 -
 43
43 -
 44
44 -
 45
45 -
 46
46 -
 47
47 -
 48
48 -
 49
49 -
 50
50 -
 51
51 -
52
-
53
-
54
-
55
-
56
-
57
-
58
-
59
-
60
-
61
-
62
-
63
-
64
-
65
-
66
-
67
-
68
-
69
-
70
-
71
-
72
 |
 |
