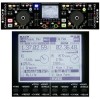
Denon DNHD2500 Operating Instructions - Page 28
Preset - dn hd2500 and serato
 |
UPC - 081757507561
View all Denon DNHD2500 manuals
Add to My Manuals
Save this manual to your list of manuals |
Page 28 highlights
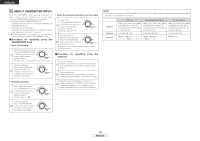
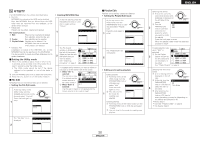
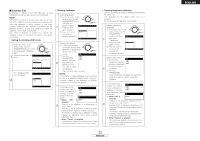
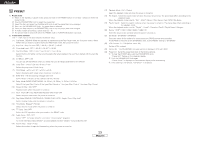
ENGLISH 15 PRESET 1. Preset mode q When in the standby or pause mode, press and hold in the PRESET button for at least 1 second to enter the preset mode. w Use the PARAMETERS knob to select the preset item. e Select the item and press the PARAMETERS knob to set the preset item to be changed. r Next, turn the PARAMETERS knob. The preset data is selected. t Select the data and press the PARAMETERS knob to set the preset data to be changed. y To make multiple presettings, repeat steps w ~ t. u The preset mode is turned off when the PRESET, CUE or PLAY/PAUSE button is pressed. 2. Preset items and data The "*" mark next to the data indicates the default value. (1) Cue Mode : DENON* (When the playback is started durnig the Play Pause mode, the Cue point is set.) / Other (When the Cue button is pushed during the Play Pause mode, the Cue point is set.) (2) Auto Cue : Auto Cue level OFF / - 60 dB / - 54 dB* / - 48 dB (3) Cross fade Level : OFF / - 60 dB / - 54 dB* / - 48 dB (4) Next File CFade : OFF / 1 sec / 2 sec / 3 sec* / 4 sec / 5 sec Select the time for fading out the currently playing file when playback of a new file is started with the next file function. (5) 3/4 Effect : OFF* / ON You can use 3/4 beat effects when you select the Echo & Flanger parameter for the effector. (6) Jump Time : 10 sec* / 20 sec / 30 sec / 1 min Select the jump time of Quick Jump. (7) Pitch Range : ±4 % / ±10 %* / ±16 % / ±24 % Select the playing pitch range when the power is turned on. (8) EOM Time : File end warning message alert time. (OFF / 10sec* / 15 sec / 20 sec / 30 sec / 60 sec / 90 sec) (9) Fader Mode (FADER START MODE) : 2L P/Cue* / 2L P/Pas / 1L P/Cue / 1L P/Pas Select 2-line type (Play / Cue) or 2 line type (Play / Pause) or 1 line type (Play / Cue) or 1 line type (Play / Pause). (10) Power On Play : ON / OFF* Playback starts when the power is turned on. (11) Pitch : Pitch ON* / Key AdjON (KEY ADJUST ON) / Pitch OFF Select the pitch mode when the power is turned on. (12) Play Mode (SINGLE / CONTINUOUS / SINGLE PLAY LOCK) : Single / Cont. / Play Lock* Select the play mode when the power is turned on. (13) Time Mode : Elapsed* / Remain Select the time mode when the power is turned on. (14) TT Tricks : ON / OFF* Select the JOG operation when you scratch in the BRAKE mode. (15) Audio Curve : ON* / OFF Select "OFF" for Serato Scratch Live or other "control signal" programs. For more information about SeratoTM, products please visit their website "www.scratchlive.net". (16) Search Step : 1step* / 2step Select the number of steps for file searching when the power is turned on. (17) Playback Mode : File* / Playlist Select the playback mode set when the power is turned on. (18) File Search : Select the search mode set when the power is turned on. The preset data differs according to the playback mode. When the playback mode is set to "File" : Artist* / Album / Title / Genre / Year / BPM / File Name (19) Playlist Search : Select the search mode set when the power is turned on. The preset data differs according to the playback mode. When the playback mode is set to "Playlist" : Create* / Favorites / Top40 / Playlist Name / Category (20) Device : HDD* / USB1 / USB2 / USB3 / USB4 / CD Select the device to be operated when the power is turned on. (21) Ext Model : DN-D4500* / DN-D4000 Select the name of the model to be connected to the DRIVE terminal and controlled. The BU4500 is the same as the DN-D4500's drive, so the PRESET setting is "DN-D4500". (22) LCD Contrast : 0 ~ 100 (default value : 40) Set the LCD's contrast. (23) Version No. : The DN-HD2500's software version is displayed. (SYSTEM / DSP) (24) Preset Init : Set all the preset data back to the factory defaults. q To clear the PRESET data, push the PARAMETERS knob. "Preset Int?" flashes on the character display. w Push the PARAMETERS knob again. "Preset Initial!" is displayed on the character display while data clearing. e Once clearing is completed, "Complete!" is displayed. 23 ENGLISH
-
 1
1 -
2
-
3
-
4
-
5
-
6
-
7
-
8
-
9
-
10
-
11
-
12
-
13
-
14
-
15
-
16
-
17
-
18
-
19
-
20
-
21
-
22
-
 23
23 -
 24
24 -
 25
25 -
 26
26 -
 27
27 -
 28
28 -
 29
29 -
 30
30
 |
 |