Electrolux EW26SS75QS Complete Owner's Guide (English) - Page 2
Please read and save this, guide, Keep a record for quick, reference, Table of contents, Questions
 |
View all Electrolux EW26SS75QS manuals
Add to My Manuals
Save this manual to your list of manuals |
Page 2 highlights
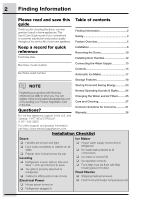
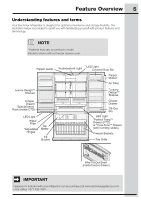
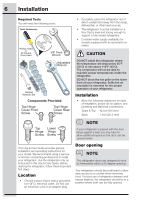
2 Finding Information Please read and save this Table of contents guide Thank you for choosing Electrolux, our new premium brand in home appliances. This Use & Care Guide is part of our commitment to customer satisfaction and product quality throughout the service life of your new appliance. Finding Information 2 Safety 3 Feature Overview 5 Keep a record for quick reference Purchase date Installation 6 Removing the Doors 10 Installing Door Handles 12 Electrolux model number Electrolux serial number Connecting the Water Supply 13 Controls 15 Automatic Ice Maker 17 Storage Features 18 NOTE Registering your product with Electrolux enhances our ability to serve you. You can register online at www.electroluxappliances.com or by sending your Product Registration Card in the mail. Questions? For toll-free telephone support in the U.S. and Canada: 1-877-4ELECTROLUX (1-877-435-3287) For online support and product information visit http://www.electroluxappliances.com Storing Food and Saving Energy 23 Normal Operating Sounds & Sights..........24 Changing the Water and Air Filters...........25 Care and Cleaning 27 Common Solutions for Concerns 31 Warranty 36 Installation Checklist Doors Handles are secure and tight Door seals completely to cabinet on all sides Freezer door is level across the top Leveling Refrigerator is level, side-to-side and tilted 1/4 inch (6 mm) front-to-back Toe grille is properly attached to refrigerator Cabinet is sitting solid on all corners Electrical Power House power turned on Refrigerator plugged in Ice Maker House water supply connected to refrigerator No water leaks present at all connections Ice maker is turned ON Ice operates correctly Front filter must be flush with filter housing (select models) Final Checks Shipping material removed Fresh food and freezer temperatures set
-
 1
1 -
 2
2 -
 3
3 -
 4
4 -
 5
5 -
 6
6 -
 7
7 -
 8
8 -
9
-
10
-
11
-
12
-
13
-
14
-
15
-
16
-
17
-
18
-
19
-
20
-
21
-
22
-
23
-
24
-
25
-
26
-
27
-
28
-
29
-
30
-
31
-
32
-
33
-
34
-
35
-
36
 |
 |
