Epson 1815p Product Information Guide - Page 10
Connecting to a Computer, Presenting Through a Wireless Network (PowerLite 1815p only) - powerlite software
 |
UPC - 010343858190
View all Epson 1815p manuals
Add to My Manuals
Save this manual to your list of manuals |
Page 10 highlights
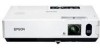
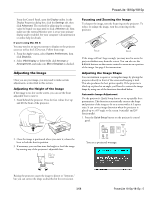
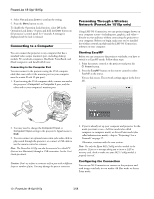
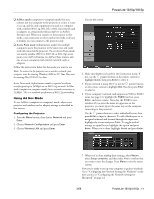
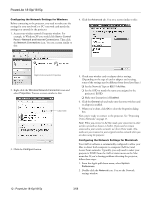
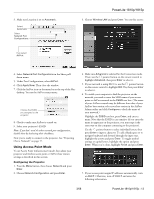
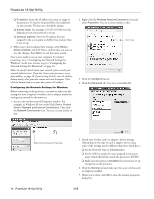
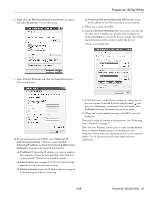
PowerLite 1810p/1815p 4. Select Yes and press Enter to confirm the setting. 5. Press the Menu button to exit. To disable the Operation Lock function, select Off in the Operation Lock menu. Or press and hold the Enter button on the projector's control panel for 7 seconds. A message is displayed and the lock is released. Connecting to a Computer You can connect the projector to any computer that has a standard video output (monitor) port, including desktop models, PC notebook computers, MacBook, PowerBook, and iBook computers, and hand-held devices. Connecting to the Computer Port You can connect to the projector using the VGA computer cable that came with it (the monitor port on your computer must be a mini D-sub 15-pin port). 1. If you're using the VGA computer cable, connect one end to the projector's Computer1 or Computer 2 port, and the other end to your computer's monitor port. Presenting Through a Wireless Network (PowerLite 1815p only) Using EMP NS Connection, you can project images shown on your computer screen-including text, graphics, and video- directly to your audience without connecting the projector to your computer. Before you begin, make sure you've installed the wireless network module and the EMP NS Connection software on your computer. Starting EasyMP Before you can connect to the projector wirelessly, you have to switch it to EasyMP mode. Follow these steps: 1. Point the remote control at the projector and press the P Power button. 2. Press the EasyMP button on the remote control to select EasyMP as the source. You see this screen. The network settings appear in the lower left. 2. You may need to change the Computer1 Input or Computer2 Input setting in the projector's Signal menu to RGB. 3. You can connect an optional stereo mini-jack audio cable to play sound through the projector, or connect a USB cable to use the remote control as a mouse. Note: The PowerLite 1815p can also be connected to a third PC (but not to a Macintosh) through a USB connection. See the User's Guide for details. Caution: Don't try to force a connector to fit a port with a different shape or number of pins. You may damage the port or connector. 3. If you've already set up your computer and projector for the mode you want to use-Ad Hoc mode (also called computer-to-computer mode) or Access Point mode (also called infrastructure mode)-skip to "Projecting Over a Network" on page 17. Otherwise, continue with the next section. Note: Use only the Epson 802.11a/b/g wireless module in the projector. If you see a message asking you to insert a LAN or memory card, check to make sure your 802.11 a/b/g module is properly inserted. Configuring the Connection You can use NS Connection to connect to the projector and send images wirelessly in two modes: Ad Hoc mode or Access Point mode. 10 - PowerLite 1810p/1815p 3/08
-
 1
1 -
2
-
3
-
4
-
 5
5 -
 6
6 -
 7
7 -
 8
8 -
 9
9 -
 10
10 -
 11
11 -
 12
12 -
 13
13 -
 14
14 -
 15
15 -
16
-
17
-
18
-
19
-
20
-
21
-
22
-
23
-
24
-
25
-
26
 |
 |