Epson 1815p Product Information Guide - Page 11
Using Ad Hoc Mode - powerlite specifications
 |
UPC - 010343858190
View all Epson 1815p manuals
Add to My Manuals
Save this manual to your list of manuals |
Page 11 highlights
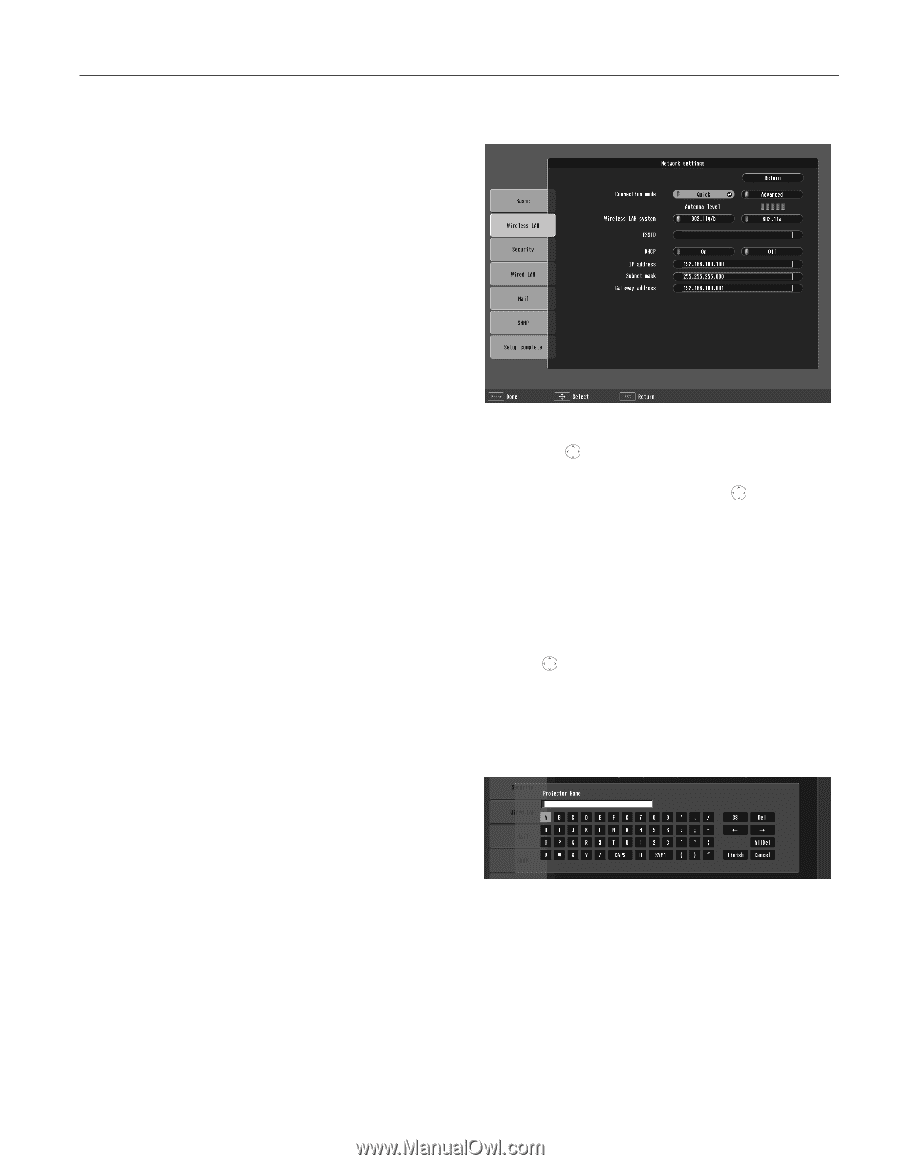
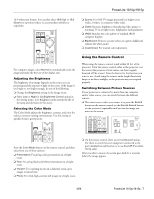
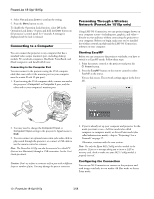
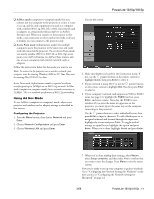
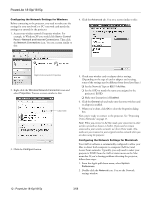
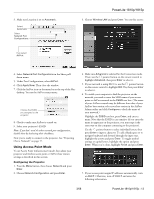
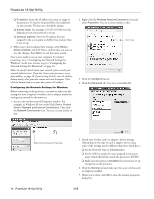
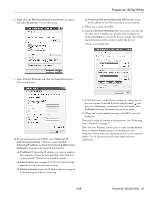
PowerLite 1810p/1815p ❏ Ad Hoc mode (computer-to-computer mode) lets you connect just one computer to the projector at a time; it's easy to set up, and the only equipment you need is a computer with a wireless (802.11g, 802.11b, or 802.11a) network card or adapter, or a Macintosh with an AirPort® or AirPort Extreme card. When you connect to the projector in this mode, your connection to other wireless networks or devices is broken; you can connect to the projector only. ❏ Access Point mode (infrastructure mode) lets multiple computers access the projector at the same time and easily trade off control of the projector. To use Access Point mode, you need a wireless (802.11a, 802.11b, or 802.11g) access point or an AirPort Extreme (or AirPort) base station, and one or more computers with wireless network cards or adapters. Follow the instructions below for the mode you want to use. Note: To connect to the projector over a wireless network, your computer must be running Windows 2000 or XP. Your Mac must be running Mac OS X 10.3 or later. Access Point mode (infrastructure mode) is required to achieve transfer speeds up to 54Mbp/s on an 802.11a/g network. Ad Hoc mode (computer-to-computer mode) limits network connections to 11Mbp/s. This is a standard specification of 802.11g networking. Using Ad Hoc Mode To use Ad Hoc (computer-to-computer) mode, adjust your projector and wireless card or adapter settings as described in this section. Configuring the Projector 1. Press the Menu button, then choose Network and press Enter. 2. Choose Network Configuration and press Enter. 3. Choose Wireless LAN and press Enter. You see this screen: 4. Make sure Quick is selected for the Connection mode. If not, use the pointer button on the remote control to highlight Quick, then press Enter to select it. 5. If your network is using 802.11a, use the pointer button on the remote control to highlight 802.11a, then press Enter to select it. 6. If your computer's network card supports an SSID or ESSID name (see page 12), highlight the ESSID text box, press Enter, and enter a name. Note that the ESSID is casesensitive (if you enter the name in uppercase on the projector, you must type it the same way on the computer connecting to the projector). Use the pointer button to select individual letters; then press Enter to input a character. To add a blank space or to navigate backward and forward through the input text, highlight the arrows and press Enter. To toggle symbol settings or capital letters, highlight the option and press Enter. When you're done, highlight Finish and press Enter. 7. When you're done making these settings, select Return, select Setup complete, and then select Yes to confirm that you want to save the changes. Press Menu to exit the menu system. Now you're ready to set up your computer to project wirelessly. Go to "Configuring the Network Settings for Windows" in the next section, or "Configuring the Network Settings for Macintosh" on page 12. 3/08 PowerLite 1810p/1815p - 11
-
 1
1 -
2
-
3
-
4
-
5
-
 6
6 -
 7
7 -
 8
8 -
 9
9 -
 10
10 -
 11
11 -
 12
12 -
 13
13 -
 14
14 -
 15
15 -
 16
16 -
17
-
18
-
19
-
20
-
21
-
22
-
23
-
24
-
25
-
26
 |
 |