Epson 7800 Printer Guide - Page 134
Installing the New Black Ink Cartridge, LOWER THE RIGHT INK LEVER, DRAINING INK XX
 |
UPC - 010343855205
View all Epson 7800 manuals
Add to My Manuals
Save this manual to your list of manuals |
Page 134 highlights
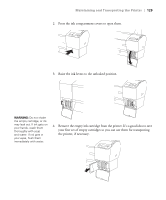
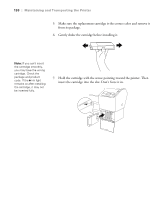
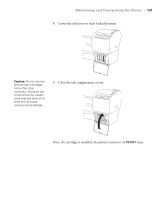
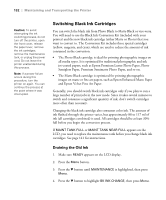
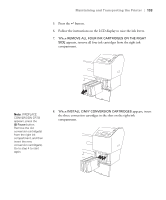
134 | Maintaining and Transporting the Printer 9. When LOWER THE RIGHT INK LEVER appears on the LCD display, lower the ink lever on the right ink compartment. The printer starts draining ink and DRAINING INK XX% appears on the LCD display. Wait until draining is complete. Installing the New Black Ink Cartridge 1. When draining is complete, RAISE THE RIGHT INK LEVER appears on the LCD. Raise the ink lever on the right ink compartment. 2. When REMOVE C/M/Y CONVERSION CARTRIDGES appears, remove the conversion cartridges from the slots on the right ink compartment. 3. When INSTALL ALL FOUR INK CARTRIDGES ON THE RIGHT SIDE appears, insert the cartridges in their specified slots, including the new black ink cartridge. 5-134
-
 1
1 -
2
-
3
-
4
-
5
-
6
-
7
-
8
-
9
-
10
-
11
-
12
-
13
-
14
-
15
-
16
-
17
-
18
-
19
-
20
-
21
-
22
-
23
-
24
-
25
-
26
-
27
-
28
-
29
-
30
-
31
-
32
-
33
-
34
-
35
-
36
-
37
-
38
-
39
-
40
-
41
-
42
-
43
-
44
-
45
-
46
-
47
-
48
-
49
-
50
-
51
-
52
-
53
-
54
-
55
-
56
-
57
-
58
-
59
-
60
-
61
-
62
-
63
-
64
-
65
-
66
-
67
-
68
-
69
-
70
-
71
-
72
-
73
-
74
-
75
-
76
-
77
-
78
-
79
-
80
-
81
-
82
-
83
-
84
-
85
-
86
-
87
-
88
-
89
-
90
-
91
-
92
-
93
-
94
-
95
-
96
-
97
-
98
-
99
-
100
-
101
-
102
-
103
-
104
-
105
-
106
-
107
-
108
-
109
-
110
-
111
-
112
-
113
-
114
-
115
-
116
-
117
-
118
-
119
-
120
-
121
-
122
-
123
-
124
-
125
-
126
-
127
-
128
-
 129
129 -
 130
130 -
 131
131 -
 132
132 -
 133
133 -
 134
134 -
 135
135 -
 136
136 -
 137
137 -
 138
138 -
 139
139 -
140
-
141
-
142
-
143
-
144
-
145
-
146
-
147
-
148
-
149
-
150
-
151
-
152
-
153
-
154
-
155
-
156
-
157
-
158
-
159
-
160
-
161
-
162
-
163
-
164
-
165
-
166
-
167
-
168
-
169
-
170
-
171
-
172
-
173
-
174
-
175
-
176
 |
 |

5-134
134
|
Maintaining and Transporting the Printer
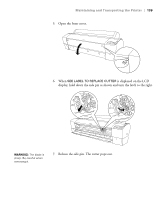
9.
When
LOWER THE RIGHT INK LEVER
appears on the LCD display,
lower the ink lever on the right ink compartment.
The printer starts draining ink and
DRAINING INK XX%
appears on
the LCD display. Wait until draining is complete.
Installing the New Black Ink Cartridge
1.
When draining is complete,
RAISE THE RIGHT INK LEVER
appears on
the LCD. Raise the ink lever on the right ink compartment.
2.
When
REMOVE C/M/Y CONVERSION CARTRIDGES
appears,
remove the conversion cartridges from the slots on the right ink
compartment.
3.
When
INSTALL ALL FOUR INK CARTRIDGES ON THE RIGHT SIDE
appears, insert the cartridges in their specified slots, including the new
black ink cartridge.