Epson 835p Product Information Guide - Page 11
Using the Control Panel, Presenting Over a Wireless Network - powerlite network video projector
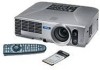 |
UPC - 010343851160
View all Epson 835p manuals
Add to My Manuals
Save this manual to your list of manuals |
Page 11 highlights
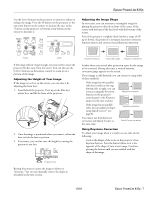
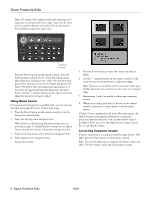
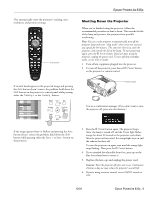
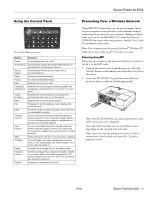
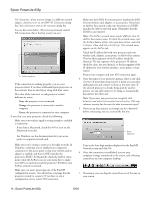
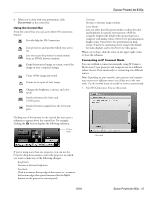
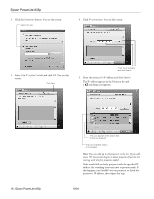
Epson PowerLite 835p Using the Control Panel Control Panel Button Functions Button Power Quick Setup Source Search Zoom Focus Help Computer/ Component Video/ S-Video Menu Esc Enter Tracking buttons Sync buttons Shift A/V Mute Resize Keystone buttons Volume Function Turns the projector on or off. Automatically adjusts the image. Adjustments are pre-selected in the projector menus. Automatically finds a source image from a connected device. Zooms the projected image. Focuses the projected image. Displays the on-screen help. Switches the source signal between EasyMP and equipment connected to the Computer/Component ports. Switches the source signal among equipment connected to the Video or S-Video ports. Displays the on-screen menu system. Pressing Esc while viewing a menu displays the previous menu. Use Enter button to select an option when the menu or help system is active. Let you manually eliminate vertical banding that may be present in some computer images. Use the Tracking buttons as arrow keys to navigate the onscreen menu and help systems. Let you correct blurriness that may be present in some computer images. Use the Sync buttons as arrow keys to navigate the on-screen menu and help systems. Press and hold to use the Tracking and Sync buttons. Turns off audio and video and displays the black, blue, or user logo background. Press it again to turn audio and video back on. Adjusts how an image fits into the display area. Corrects an image that is keystone-shaped or wider on one side. (When used while pressing the Shift button, these function as Sync and Tracking buttons; see descriptions above.) Increases or decreases the sound. Presenting Over a Wireless Network Using EMP NS Connection, you can project images shown on your computer screen directly to your audience without connecting the projector to your computer. Before you begin, make sure you've installed EMP NS Connection from the CD-ROM that came with your projector. See the User's Guide for installation instructions. Note: Your computer must be running Microsoft® Windows XP, 2000, Me or 98, or Macintosh® OS X 10.2.4 or later. Starting EasyMP Before you can connect to the projector wirelessly, you have to switch it to EasyMP mode. 1. Turn on the remote control and the projector. Press the EasyMP button on the remote control to select EasyMP as the source. 2. Locate the EPSON 802.11g card that came with your projector. Insert it with the label facing upward. Note: Only the EPSON 802.11g card is guaranteed to work. Other cards may not be compatible. Once the card is inserted, you see one of these screens, depending on the currently selected mode: Note: If you see a message asking you to insert a LAN or memory card, check to make sure your 802.11g card is properly inserted. 10/04 Epson PowerLite 835p - 11
-
 1
1 -
2
-
3
-
4
-
5
-
 6
6 -
 7
7 -
 8
8 -
 9
9 -
 10
10 -
 11
11 -
 12
12 -
 13
13 -
 14
14 -
 15
15 -
 16
16 -
17
-
18
-
19
-
20
 |
 |
