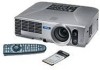
Epson 835p Product Information Guide - Page 15
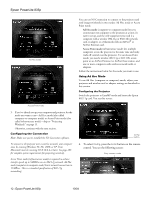
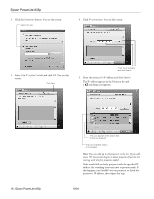
Start NS Connection. You see this screen - powerlite parts
 |
UPC - 010343851160
View all Epson 835p manuals
Add to My Manuals
Save this manual to your list of manuals |
Page 15 highlights
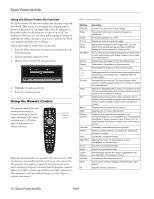
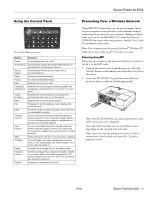
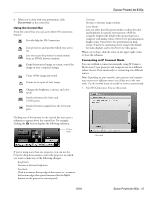
8. When you're done with your presentation, click Disconnect on the control bar. Using the Control Bar From the control bar, you can access these NS Connection features: Provides help for NS Connection. Lists projectors and specifies which ones are in use. Lets you access the projector's menu system from an HTML browser window. Keeps the projected image on screen, even if the image on your computer changes. Turns off the image and sound. Zooms in on a part of your image. Changes the brightness, contrast, and color mode. Switches between the Video and S-Video ports. Switches between signals from the Computer ports. Clicking one of the buttons on the control bar may cause a submenu to appear above the control bar. For example, clicking the button displays the following submenu: Click to close Epson PowerLite 835p ❏ Contrast Increase or decrease image contrast. ❏ Color Mode Lets you select from five preset modes to adjust the color and brightness for specific environments: sRGB for computer displays (the default when projecting from a computer with analog video), Dynamic for presentations in bright rooms, Presentation for presentations in dark rooms, Theatre for optimizing movie images (the default for video display), and Living Room for video games. When you're done, click the arrow in the upper right corner to close the submenu. Connecting in IP Connect Mode You can establish a connection manually using IP Connect Mode even if your projector and computer are on a different subnet (Access Point mode only) or connecting over different routers. Note: Depending on your network, your projector and computer may connect over different routers even if they are in the same room. Try this method if you are unable to connect automatically. 1. Start NS Connection. You see this screen: Click here If you're using more than one projector, you can use the Projector drop-down menu to select the projector on which you want to make any of the following changes: ❏ Brightness Increase or decrease brightness. ❏ Keystone Click + to narrow the top edge of the screen, or - to narrow the bottom edge (this option functions like the Sync buttons on the projector's control panel). 10/04 Epson PowerLite 835p - 15
-
 1
1 -
2
-
3
-
4
-
5
-
6
-
7
-
8
-
9
-
 10
10 -
 11
11 -
 12
12 -
 13
13 -
 14
14 -
 15
15 -
 16
16 -
 17
17 -
 18
18 -
 19
19 -
 20
20
 |
 |
