Epson DM-D210 Technical Reference Guide - Page 77
Serial (Pass-through
 |
View all Epson DM-D210 manuals
Add to My Manuals
Save this manual to your list of manuals |
Page 77 highlights
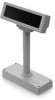
Chapter 2 Setup Serial (Pass-through) DM-D110/DM-D210 Ferrite core USB cable Cap RS-232 cable JP 1-2 Serial cable Computer Serial cable AC adapter Power cord Extension power cable DP-110/DP-210 2 TM Printer DM-D110 DM-D210 USB cable * Do not remove the cap (factory default condition) Not used (bundle inside DP-110/DP-210) RS-232 cable Remove the cap * Attach the ferrite core * Connect to the DM-D connector of DP-110/DP-210 DP-110 DP-210 DM-D connector Power supply connector Connect the RS-232 cable of DM-D110/DM-D210 Connect the AC adapter Extension power cable connec- Use the extension power cable and connect to the TM printer's tor power supply connector Computer interface connector Use the serial cable and connect to the computer's serial connector Printer interface connector Use the serial cable and connect to the TM printer's serial connector JP1 Set it to 1-2 (Default setting) JP2 Set it to 1-2 (Default setting) Not available for the RS-232 model. 77
-
 1
1 -
2
-
3
-
4
-
5
-
6
-
7
-
8
-
9
-
10
-
11
-
12
-
13
-
14
-
15
-
16
-
17
-
18
-
19
-
20
-
21
-
22
-
23
-
24
-
25
-
26
-
27
-
28
-
29
-
30
-
31
-
32
-
33
-
34
-
35
-
36
-
37
-
38
-
39
-
40
-
41
-
42
-
43
-
44
-
45
-
46
-
47
-
48
-
49
-
50
-
51
-
52
-
53
-
54
-
55
-
56
-
57
-
58
-
59
-
60
-
61
-
62
-
63
-
64
-
65
-
66
-
67
-
68
-
69
-
70
-
71
-
 72
72 -
 73
73 -
 74
74 -
 75
75 -
 76
76 -
 77
77 -
 78
78 -
 79
79 -
 80
80 -
 81
81 -
 82
82 -
83
-
84
-
85
-
86
-
87
-
88
-
89
-
90
-
91
-
92
-
93
-
94
-
95
-
96
-
97
-
98
-
99
-
100
-
101
-
102
-
103
-
104
-
105
-
106
-
107
 |
 |
