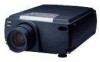
Epson EMP-8000 Owners Manual - Page 25
Setting Up the Projector
 |
View all Epson EMP-8000 manuals
Add to My Manuals
Save this manual to your list of manuals |
Page 25 highlights
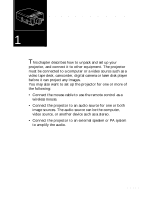
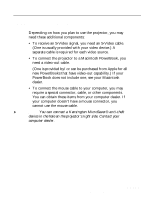
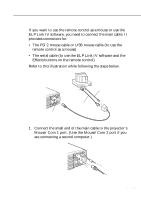
Setting Up the Projector 1. Place the projector on a sturdy, level surface within five feet of the computer or video source. ♦ Caution: Do not hold the projector by the lens. This can damage the lens. 2. Place the projector at a correct distance from the screen. The distance between the projector and the screen determines the actual image size. Use the general guidelines below to determine the correct distance. Screen size Horizontal distance from projector to screen 300 inches (610x460cm) 460.6 inches (11.7 m) ~ 586.6 inches (14.9m) 200 inches (410x300cm) 307.1 inches (7.8 m) ~ 389.8 inches (9.9 m) 100 inches (200x150cm) 153.5 inches (3.9 m) ~ 192.9 inches (4.9 m) 80 inches (160x120cm) 122.0 inches (3.1 m) ~ 153.5 inches (3.9 m) 60 inches (120x90cm) 90.6 inches (2.3 m) ~ 114.2 inches (2.9 m) 40 inches (81x61cm) 59.1 inches (1.5 m) ~ 74.8 inches (1.9 m) 30 inches (61x46cm) 43.3 inches (1.1 m) ~ 55.1 inches (1.4 m) ♦ Note: The projection distance described above is for a standard lens. When using the optional lens, refer to the Owner's manuals attached to it. 3. Turn the projector so that the lens is at right angles to the screen. If the projector is not angled correctly, the screen image will be crooked. 4. Connect one end of the power cable to the projector's power connector. Connect the other end to an earthed electrical socket. The projector should be in sleep mode, indicated by an orange power indicator. s s s s 4
-
 1
1 -
2
-
3
-
4
-
5
-
6
-
7
-
8
-
9
-
10
-
11
-
12
-
13
-
14
-
15
-
16
-
17
-
18
-
19
-
 20
20 -
 21
21 -
 22
22 -
 23
23 -
 24
24 -
 25
25 -
 26
26 -
 27
27 -
 28
28 -
 29
29 -
 30
30 -
31
-
32
-
33
-
34
-
35
-
36
-
37
-
38
-
39
-
40
-
41
-
42
-
43
-
44
-
45
-
46
-
47
-
48
-
49
-
50
-
51
-
52
-
53
-
54
-
55
-
56
-
57
-
58
-
59
-
60
-
61
-
62
-
63
-
64
-
65
-
66
-
67
-
68
-
69
-
70
-
71
-
72
-
73
-
74
-
75
-
76
-
77
-
78
-
79
-
80
-
81
-
82
-
83
-
84
-
85
-
86
-
87
-
88
-
89
-
90
-
91
-
92
-
93
-
94
-
95
-
96
-
97
-
98
-
99
-
100
-
101
-
102
-
103
-
104
-
105
-
106
-
107
-
108
-
109
-
110
-
111
-
112
-
113
-
114
-
115
-
116
-
117
-
118
-
119
-
120
-
121
-
122
-
123
-
124
-
125
-
126
-
127
-
128
-
129
-
130
-
131
-
132
-
133
-
134
-
135
-
136
-
137
-
138
-
139
 |
 |
