Epson EPL-6000 User Manual - Page 45
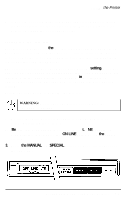
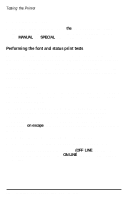
Performing the font and status print tests, MANUAL, SPECIAL, on escape, OFF LINE
 |
View all Epson EPL-6000 manuals
Add to My Manuals
Save this manual to your list of manuals |
Page 45 highlights
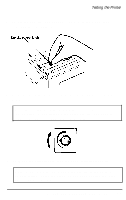
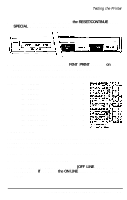
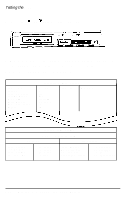
Testing the Printer 5. Close the printer cover. 6. Print the self test again to check the new print density setting. (To print the self test, make sure the printer is off line, then press the MANUAL and SPECIAL buttons at the same time.) Performing the font and status print tests There are two other tests you can perform, in addition to the self test. The font print test gives you information on available fonts and the status test lists printer settings. Like the self test, the successful completion of either of these tests indicates that you have correctly set up your printer and that you are ready to connect the printer to your computer. The font print test The font print test gives you details on available HP fonts, including font source and font ID number, pitch, point size, available symbol sets, and a print sample. The symbol set ID numbers listed on the font print test (in the symbol set column) provide the unique portion of the escape sequence needed to select that particular symbol set. For more information on symbol sets, see Appendix A, and for more information on escape sequences, see the Printer Commands section in Chapter 5. Follow the steps below to perform the font print test: 1. Be sure that your printer is plugged in and the power is on. 2. Be sure that your printer is off line. (OFF LINE appears on your display.) If not, press the ON LINE button to set the printer off line. 2-8 Testing and Connecting Your Printer
-
 1
1 -
2
-
3
-
4
-
5
-
6
-
7
-
8
-
9
-
10
-
11
-
12
-
13
-
14
-
15
-
16
-
17
-
18
-
19
-
20
-
21
-
22
-
23
-
24
-
25
-
26
-
27
-
28
-
29
-
30
-
31
-
32
-
33
-
34
-
35
-
36
-
37
-
38
-
39
-
 40
40 -
 41
41 -
 42
42 -
 43
43 -
 44
44 -
 45
45 -
 46
46 -
 47
47 -
 48
48 -
 49
49 -
 50
50 -
51
-
52
-
53
-
54
-
55
-
56
-
57
-
58
-
59
-
60
-
61
-
62
-
63
-
64
-
65
-
66
-
67
-
68
-
69
-
70
-
71
-
72
-
73
-
74
-
75
-
76
-
77
-
78
-
79
-
80
-
81
-
82
-
83
-
84
-
85
-
86
-
87
-
88
-
89
-
90
-
91
-
92
-
93
-
94
-
95
-
96
-
97
-
98
-
99
-
100
-
101
-
102
-
103
-
104
-
105
-
106
-
107
-
108
-
109
-
110
-
111
-
112
-
113
-
114
-
115
-
116
-
117
-
118
-
119
-
120
-
121
-
122
-
123
-
124
-
125
-
126
-
127
-
128
-
129
-
130
-
131
-
132
-
133
-
134
-
135
-
136
-
137
-
138
-
139
-
140
-
141
-
142
-
143
-
144
-
145
-
146
-
147
-
148
-
149
-
150
-
151
-
152
-
153
-
154
-
155
-
156
-
157
-
158
-
159
-
160
-
161
-
162
-
163
-
164
-
165
-
166
-
167
-
168
-
169
-
170
-
171
-
172
-
173
-
174
-
175
-
176
-
177
-
178
-
179
-
180
-
181
-
182
-
183
-
184
-
185
-
186
-
187
-
188
-
189
-
190
-
191
-
192
-
193
-
194
-
195
-
196
-
197
-
198
-
199
-
200
-
201
-
202
-
203
-
204
-
205
-
206
-
207
-
208
-
209
-
210
-
211
-
212
-
213
-
214
-
215
-
216
-
217
-
218
-
219
 |
 |
