Epson Expression 1600 User Manual - Page 46
Installing Adobe Photoshop 5.0 LE, Installing MonacoEZcolor
 |
View all Epson Expression 1600 manuals
Add to My Manuals
Save this manual to your list of manuals |
Page 46 highlights
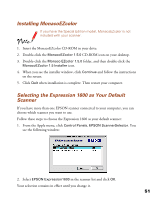
5. At the first screen, click English-US, then follow the instructions on the screen to install TextBridge Classic. When installation is complete, remove the EPSON Expression 1600 Scanning Tools CD-ROM. If you're done installing software, restart your computer. Installing Adobe Photoshop 5.0 LE To find out how to upgrade to the full version of Adobe Photoshop 5.0, see the Acrobat file titled Upgrade.pdf on the Adobe Photoshop 5.0 LE CD-ROM (you must have Acrobat Reader installed to view this file). 1. Insert the Adobe Photoshop 5.0 LE CD-ROM in your drive. 2. Double-click the My Computer icon on your Windows desktop, then double-click the Photosle CD-ROM icon. 3. Double-click the Photosle folder, then double-click the setup icon. 4. Follow the instructions on the screen. When you see the User Information dialog box, enter your name and company, and then enter the serial number (including the hyphen) of your software exactly as it appears on the CD-ROM sleeve. Then click Next. 5. Follow the instructions on the screen to complete installation and create a Photoshop 5.0 Limited Edition program folder in your Adobe program group. 6. Remove the Adobe Photoshop 5.0 LE CD-ROM. If you're done installing software, restart your computer. Installing MonacoEZcolor 1. Insert the MonacoEZcolor CD-ROM in your drive. 2. Double-click the My Computer icon on your Windows desktop, then double-click the MonacoEZcolor CD-ROM icon. 3. Double-click the Setup.exe icon and follow the instructions on the screen. When you're done installing the software, click Finish and restart your computer. 46
-
 1
1 -
2
-
3
-
4
-
5
-
6
-
7
-
8
-
9
-
10
-
11
-
12
-
13
-
14
-
15
-
16
-
17
-
18
-
19
-
20
-
21
-
22
-
23
-
24
-
25
-
26
-
27
-
28
-
29
-
30
-
31
-
32
-
33
-
34
-
35
-
36
-
37
-
38
-
39
-
40
-
 41
41 -
 42
42 -
 43
43 -
 44
44 -
 45
45 -
 46
46 -
 47
47 -
 48
48 -
 49
49 -
 50
50 -
 51
51 -
52
-
53
-
54
-
55
-
56
-
57
-
58
-
59
-
60
-
61
-
62
-
63
-
64
-
65
-
66
-
67
-
68
-
69
-
70
-
71
-
72
-
73
-
74
-
75
-
76
-
77
-
78
-
79
-
80
-
81
-
82
-
83
-
84
-
85
-
86
-
87
-
88
-
89
-
90
-
91
-
92
-
93
-
94
-
95
-
96
-
97
-
98
-
99
-
100
-
101
-
102
-
103
-
104
-
105
-
106
-
107
-
108
-
109
-
110
-
111
-
112
-
113
-
114
-
115
-
116
-
117
-
118
-
119
-
120
-
121
-
122
-
123
-
124
-
125
-
126
-
127
-
128
-
129
-
130
-
131
-
132
-
133
-
134
-
135
-
136
-
137
-
138
-
139
-
140
-
141
-
142
-
143
-
144
-
145
-
146
-
147
-
148
-
149
-
150
-
151
-
152
-
153
-
154
 |
 |
