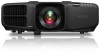
Epson G6970WU User Manual - Page 49
Removing the Lens Unit, Lens Type, Parent topic, Related tasks, Caution
 |
View all Epson G6970WU manuals
Add to My Manuals
Save this manual to your list of manuals |
Page 49 highlights
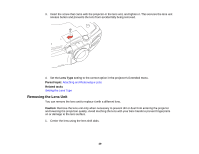
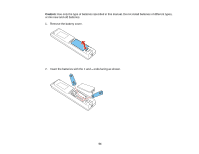
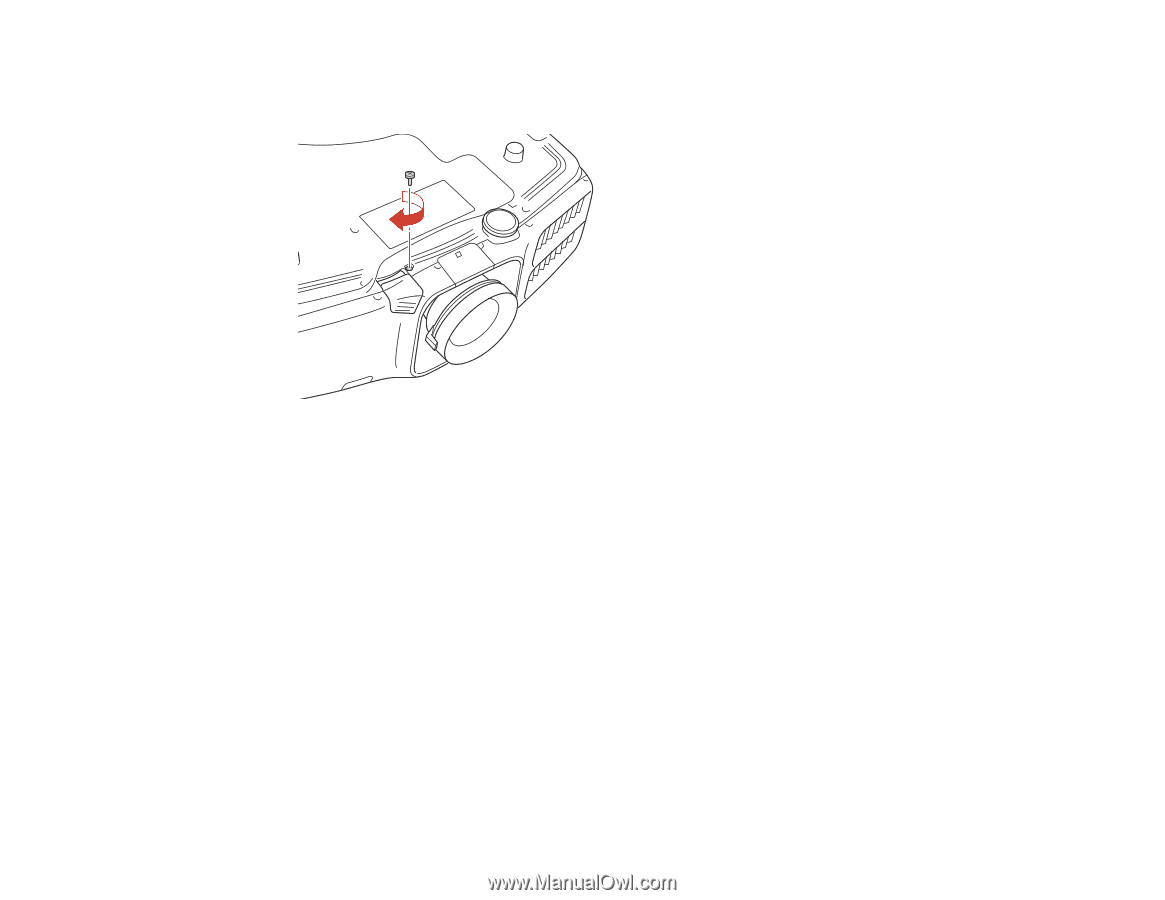
3. Insert the screw that came with the projector or the lens unit, and tighten it. This secures the lens unit release button and prevents the lens from accidentally being removed. 4. Set the Lens Type setting to the correct option in the projector's Extended menu. Parent topic: Attaching and Removing a Lens Related tasks Setting the Lens Type Removing the Lens Unit You can remove the lens unit to replace it with a different lens. Caution: Remove the lens unit only when necessary to prevent dirt or dust from entering the projector and lowering the projection quality. Avoid touching the lens with your bare hands to prevent fingerprints on or damage to the lens surface. 1. Center the lens using the lens shift dials. 49
-
 1
1 -
2
-
3
-
4
-
5
-
6
-
7
-
8
-
9
-
10
-
11
-
12
-
13
-
14
-
15
-
16
-
17
-
18
-
19
-
20
-
21
-
22
-
23
-
24
-
25
-
26
-
27
-
28
-
29
-
30
-
31
-
32
-
33
-
34
-
35
-
36
-
37
-
38
-
39
-
40
-
41
-
42
-
43
-
 44
44 -
 45
45 -
 46
46 -
 47
47 -
 48
48 -
 49
49 -
 50
50 -
 51
51 -
 52
52 -
 53
53 -
 54
54 -
55
-
56
-
57
-
58
-
59
-
60
-
61
-
62
-
63
-
64
-
65
-
66
-
67
-
68
-
69
-
70
-
71
-
72
-
73
-
74
-
75
-
76
-
77
-
78
-
79
-
80
-
81
-
82
-
83
-
84
-
85
-
86
-
87
-
88
-
89
-
90
-
91
-
92
-
93
-
94
-
95
-
96
-
97
-
98
-
99
-
100
-
101
-
102
-
103
-
104
-
105
-
106
-
107
-
108
-
109
-
110
-
111
-
112
-
113
-
114
-
115
-
116
-
117
-
118
-
119
-
120
-
121
-
122
-
123
-
124
-
125
-
126
-
127
-
128
-
129
-
130
-
131
-
132
-
133
-
134
-
135
-
136
-
137
-
138
-
139
-
140
-
141
-
142
-
143
-
144
-
145
-
146
-
147
-
148
-
149
-
150
-
151
-
152
-
153
-
154
-
155
-
156
-
157
-
158
-
159
-
160
-
161
-
162
-
163
-
164
-
165
-
166
-
167
-
168
-
169
-
170
-
171
-
172
-
173
-
174
-
175
-
176
-
177
-
178
-
179
-
180
-
181
-
182
-
183
-
184
-
185
-
186
-
187
-
188
-
189
-
190
-
191
-
192
-
193
-
194
-
195
-
196
-
197
-
198
-
199
-
200
-
201
-
202
-
203
-
204
-
205
-
206
-
207
-
208
-
209
-
210
-
211
-
212
-
213
-
214
-
215
-
216
-
217
-
218
-
219
-
220
-
221
-
222
-
223
-
224
-
225
-
226
-
227
-
228
-
229
-
230
-
231
-
232
-
233
-
234
-
235
-
236
-
237
-
238
-
239
-
240
-
241
-
242
-
243
-
244
-
245
-
246
-
247
-
248
-
249
-
250
-
251
-
252
-
253
-
254
-
255
-
256
-
257
-
258
-
259
-
260
-
261
-
262
-
263
-
264
-
265
-
266
-
267
-
268
-
269
-
270
-
271
-
272
-
273
-
274
-
275
-
276
-
277
-
278
-
279
-
280
-
281
-
282
-
283
-
284
-
285
-
286
-
287
-
288
-
289
-
290
-
291
-
292
-
293
-
294
 |
 |
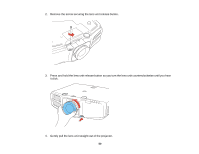
3.
Insert the screw that came with the projector or the lens unit, and tighten it. This secures the lens unit
release button and prevents the lens from accidentally being removed.
4.
Set the
Lens Type
setting to the correct option in the projector's Extended menu.
Parent topic:
Attaching and Removing a Lens
Related tasks
Setting the Lens Type
Removing the Lens Unit
You can remove the lens unit to replace it with a different lens.
Caution:
Remove the lens unit only when necessary to prevent dirt or dust from entering the projector
and lowering the projection quality. Avoid touching the lens with your bare hands to prevent fingerprints
on or damage to the lens surface.
1.
Center the lens using the lens shift dials.
49