Epson LQ-300 Product Information Guide - Page 7
Installing The Ribbon Cartridge, Running The Self Test - installer
 |
View all Epson LQ-300 manuals
Add to My Manuals
Save this manual to your list of manuals |
Page 7 highlights
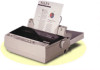
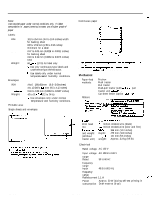
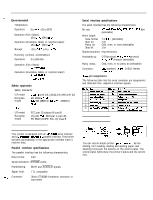
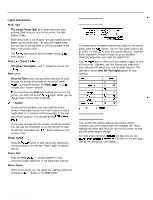
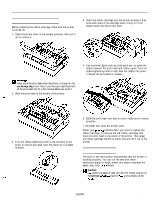
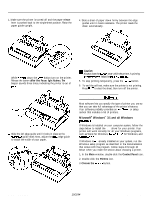
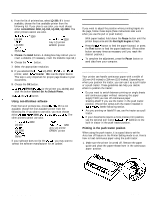
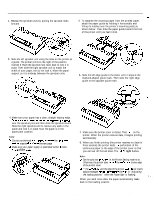
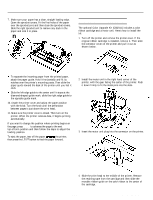
Installing the Ribbon Cartridge Before installing the ribbon cartridge, make sure the printer is turned off. 1. Open the printer cover to the upright position+ then pull it up to remove it. EPSON LQ-300 4. Insert the ribbon cartridge into the printer as shown; then press both sides of the cartridge down firmly to fit the plastic hooks into the printer slots. 0 wathg: Never moue the print head while the printer is turned on; this can damage the printer. Also, if you have just used the printer, let the print head cool for a few minutes before you touch it. 2. Slide the print head to the middle of the printer. 5. Use a pointed object, such as a ball point pen, to guide the ribbon between the print head and ribbon guide. Turn the ribbon-tightening knob to help feed the ribbon into place; it should not be twisted or creased. 3. Turn the ribbon-tightening knob in the direction of the arrow to remove any slack from the ribbon so it is easier toinstall. 6. Slide the print head from side to side to make sure it moves smoothly. 7. Re-install and close the printer cover. When your printing becomes faint, you need to replace the ribbon cartridge. To remove the old ribbon cartridge, first move the print head to the center of the printer. Then grasp the ribbon cartridge handle on either side and lift it out of the printer. Running the Self Test The built-in self test function demonstrates that the printer is working properly. You can run the test with either continuous paper or single sheets; this section describes the easier way, with single sheets. la Caution: You should use paper at least 210 mm (8.3 inches) wide to run the self test; otheruise, the print heud prints directly on the pl&n. Dot Matrix Printers 10/2/94 EPSON LQ-300-7
-
 1
1 -
 2
2 -
 3
3 -
 4
4 -
 5
5 -
 6
6 -
 7
7 -
 8
8 -
 9
9 -
 10
10 -
 11
11 -
 12
12 -
13
 |
 |
