Epson LQ-300 Product Information Guide - Page 9
Adjusting The Loading Position, Printing On Continuous Paper, Lq-300. If, Actionprinter 3260, Lq-150
 |
View all Epson LQ-300 manuals
Add to My Manuals
Save this manual to your list of manuals |
Page 9 highlights
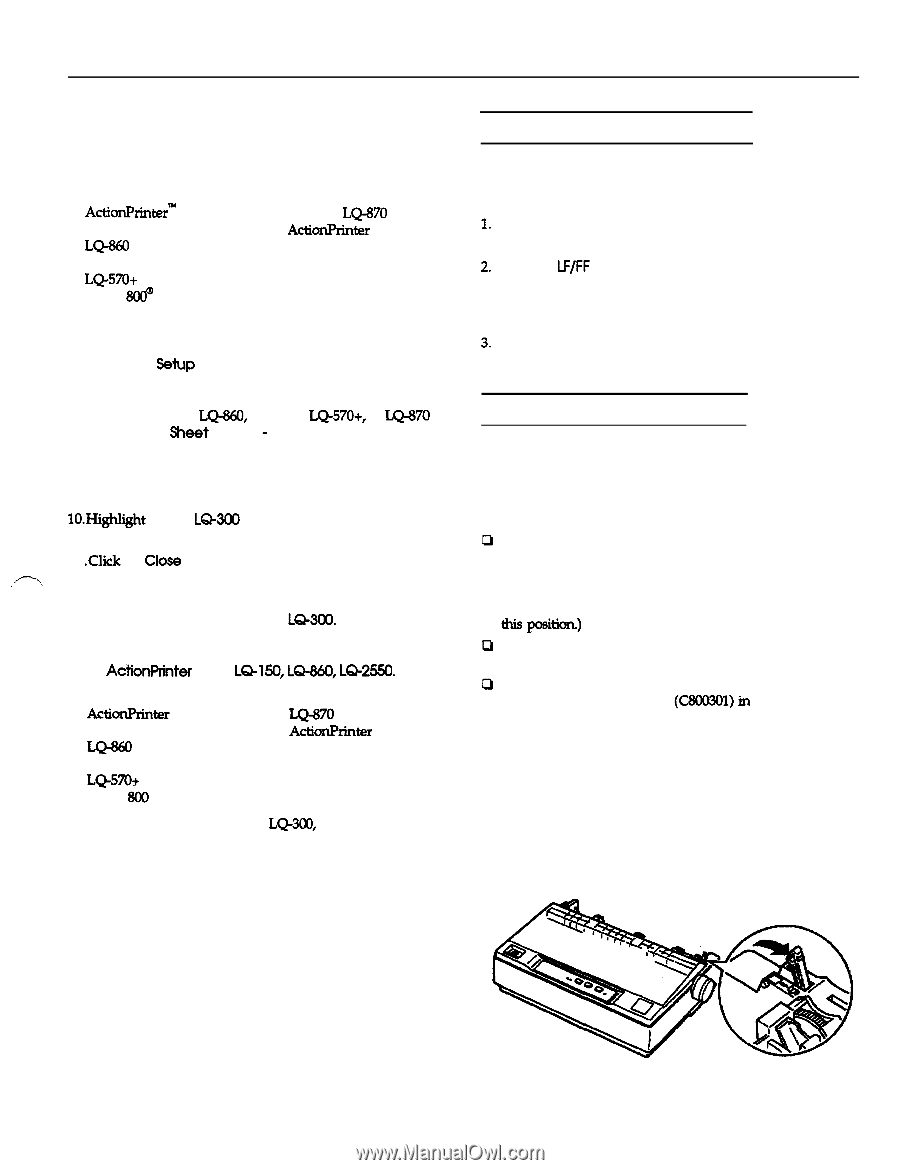
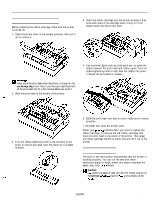
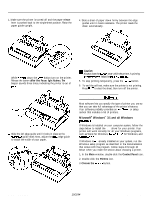
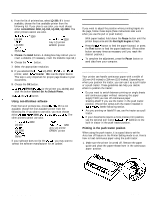
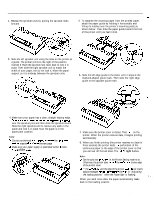
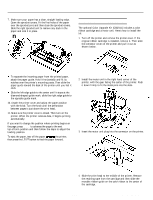
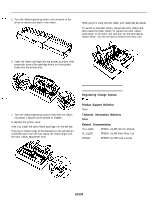
EPSON LQ-300 ,f---Y 4. From the list of printers box, select LQ-300. If it is not available, choose the first available printer from the following list. If you plan to use color, you must choose either ActionPrinter 3260, LQ-150, LQ-860, LQ-2550. The other printers cannot use color. ActionPrinter~ 3260 LQ-150 w-860 LQ-2550 LQ-570+ Stylus &IO@ LQ-870 ActionPrinter 3250 Any LQ printer EPSON printer 5. Choose the Install button. A dialog box may instruct you to insert a diskette. (If necessary, insert the diskette required.) 6. Choose the Setup button. 7. Select the appropriate resolution. 8. If you selected the LQ-860, LQ-2550, LQ-570+, or LQa70 printer, select Sheet Feeder - Bin 1 as the Paper Source. This step is very important for proper page breaks in your documents. 9. Choose the OK button. lO.Highlight EPSON LQ300 (or the printer you added) and click the button labeled Set As Default Printer. 11 .Click the Close button. Using non-Windows software From the list of printers box, choose LQ-300. If it is not available, choose the first available printer from the following list. If you plan to use color, you must choose either ActionPrinter 3260, LQ-150, LQ-860, LQ-2!550. The other printers cannot use color. ActionPrinter 3260 LQ-150 LQ-860 LQ-2550 LQ-570+ Stylus 800 LQ-870 ActionPrinter 3250 Any LQ printer EPSON printer If your software does not list the LQ-300, you may want to contact the software manufacturer for an update. Adjusting the Loading Position If you want to adjust the position where printing begins on the page, follow these steps (these instructions also work when you use the pull or push tractor): With paper loaded, hold down the Pause button until the printer beeps once and the Font light begins to flash. Press the LF/FF button to feed the paper forward, or press the Font button to feed the paper backward. '(Press either button as many times as necessary until you reach the desired position.) To complete the adjustment, press the Pause button or send data from your computer. Printing on Continuous Paper Your printer can handle continuous paper with a width of 101 mm (4.0 inches) to 254 mm (10.0 inches). Depending on where you position the tractor, you can use it as a pull tractor or a push tractor. These guidelines can help you decide where to position the tractor: Do you want to switch between printing on single sheets and continuous paper without removing the paper supply? Will you tear off continuous paper sheet-by-sheet? If yes, use the tractor in the push tractor position. (The printer comes with the tractor installed in this positim) seethe following section. Are you printing on labels? If yes, use the tractor as a pull tractor. If your documents require a more precise print position, use the optional pull tractor (C800301) in addition to the built-in tractor in the push tractor position. Printing in the push tractor position When using the push tractor, it is a good idea to set the Auto tear off feature in the Printer Setting mode to on. Here's how to load continuous paper using the push tractor: 1. Make sure the printer is turned off. Remove the paper guide and place the paper-release lever in the continuous paper position. Dot Matrix Printers 10/2/94 EPSON LQ-300-9
-
 1
1 -
2
-
3
-
 4
4 -
 5
5 -
 6
6 -
 7
7 -
 8
8 -
 9
9 -
 10
10 -
 11
11 -
 12
12 -
 13
13
 |
 |