Epson PowerLite 822 User's Guide - Page 50
Using the Projector’s Menu System
 |
View all Epson PowerLite 822 manuals
Add to My Manuals
Save this manual to your list of manuals |
Page 50 highlights
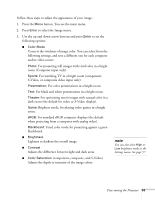
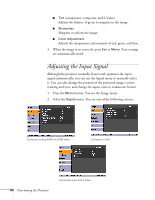
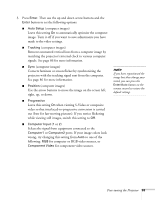
Using the Projector's Menu System The projector menus let you adjust and customize the projector features: ■ The Image menu lets you modify the colors of the projected image and fine-tune brightness, contrast, and sharpness. See page 52. ■ The Signal menu lets you make adjustments to the input signal. You can select your input source, change the image position and aspect ratio, and adjust tracking and sync for computer images. See page 54. ■ The Settings menu lets you customize the way you use the projector. It allows you to adjust the volume and keystone correction, set lamp brightness to high or low, control use of the remote control receivers, project a test pattern for adjustments, and disable buttons on the projector while you are projecting. See page 56. ■ The Extended menu lets you customize the way you set up the projector. Among the options, you can select the menu language, set rear or ceiling projection, turn closed captions on or off, and record a custom image or logo to be displayed as the startup screen or whenever you press the A/V Mute button on the remote control. See page 58 and page 62. ■ The Network menu lets you select your network settings and optional passwords for monitoring the projector over a network or over the web. See page 60. ■ The Info menu provides information about lamp status and computer or video settings. See page 61. ■ The Reset menu lets you restore the projector's factory default settings. See page 69. 50 Fine-tuning the Projector
-
 1
1 -
2
-
3
-
4
-
5
-
6
-
7
-
8
-
9
-
10
-
11
-
12
-
13
-
14
-
15
-
16
-
17
-
18
-
19
-
20
-
21
-
22
-
23
-
24
-
25
-
26
-
27
-
28
-
29
-
30
-
31
-
32
-
33
-
34
-
35
-
36
-
37
-
38
-
39
-
40
-
41
-
42
-
43
-
44
-
 45
45 -
 46
46 -
 47
47 -
 48
48 -
 49
49 -
 50
50 -
 51
51 -
 52
52 -
 53
53 -
 54
54 -
 55
55 -
56
-
57
-
58
-
59
-
60
-
61
-
62
-
63
-
64
-
65
-
66
-
67
-
68
-
69
-
70
-
71
-
72
-
73
-
74
-
75
-
76
-
77
-
78
-
79
-
80
-
81
-
82
-
83
-
84
-
85
-
86
-
87
-
88
-
89
-
90
-
91
-
92
-
93
-
94
-
95
-
96
-
97
-
98
-
99
-
100
-
101
-
102
-
103
-
104
-
105
-
106
-
107
-
108
-
109
-
110
-
111
-
112
-
113
-
114
-
115
-
116
-
117
-
118
-
119
-
120
 |
 |
