Epson PowerLite 9300i User's Guide - Page 84
Connecting and Configuring the Projector
 |
View all Epson PowerLite 9300i manuals
Add to My Manuals
Save this manual to your list of manuals |
Page 84 highlights
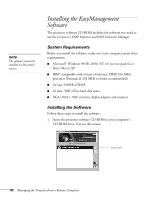
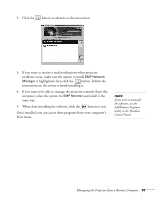
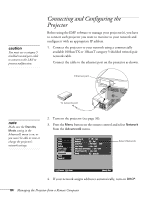
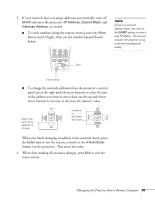
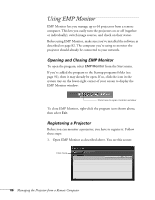
caution You must use a category 5 shielded twisted-pair cable to connect to the LAN to prevent malfunction. Connecting and Configuring the Projector Before using the EMP software to manage your projector(s), you have to connect each projector you want to monitor to your network and configure it with an appropriate IP address. 1. Connect the projector to your network using a commercially available 100baseTX or 10baseT category 5 shielded twisted-pair network cable. Connect the cable to the ethernet port on the projector as shown. Ethernet port To network port note Make sure the Standby Mode setting in the Advanced1 menu is on, or you won't be able to view or change the projector's network settings. 2. Turn on the projector (see page 36). 3. Press the Menu button on the remote control and select Network from the Advanced2 menu. Video Audio Effect Setting User's Logo Advanced1 Advanced2 About Reset All Projector ID : 1 Set Network Set COM Port : RS-232C USB Auto Setup : ON OFF BNC Sync Termination : ON OFF Direct Power ON : ON OFF Reset Execute Select Network [ ]: Select [ ]: Enter [Menu]: Exit 4. If your network assigns addresses automatically, turn on DHCP. 84 Managing the Projector from a Remote Computer
-
 1
1 -
2
-
3
-
4
-
5
-
6
-
7
-
8
-
9
-
10
-
11
-
12
-
13
-
14
-
15
-
16
-
17
-
18
-
19
-
20
-
21
-
22
-
23
-
24
-
25
-
26
-
27
-
28
-
29
-
30
-
31
-
32
-
33
-
34
-
35
-
36
-
37
-
38
-
39
-
40
-
41
-
42
-
43
-
44
-
45
-
46
-
47
-
48
-
49
-
50
-
51
-
52
-
53
-
54
-
55
-
56
-
57
-
58
-
59
-
60
-
61
-
62
-
63
-
64
-
65
-
66
-
67
-
68
-
69
-
70
-
71
-
72
-
73
-
74
-
75
-
76
-
77
-
78
-
 79
79 -
 80
80 -
 81
81 -
 82
82 -
 83
83 -
 84
84 -
 85
85 -
 86
86 -
 87
87 -
 88
88 -
 89
89 -
90
-
91
-
92
-
93
-
94
-
95
-
96
-
97
-
98
-
99
-
100
-
101
-
102
-
103
-
104
-
105
-
106
-
107
-
108
-
109
-
110
-
111
-
112
-
113
-
114
-
115
-
116
-
117
-
118
-
119
-
120
-
121
-
122
-
123
-
124
-
125
-
126
-
127
-
128
-
129
-
130
-
131
-
132
-
133
-
134
-
135
-
136
-
137
-
138
-
139
-
140
-
141
-
142
 |
 |
