Epson PowerLite S9 User's Guide - Page 53
Resizing Video Images, PowerLite S9/PowerLite 1220
 |
View all Epson PowerLite S9 manuals
Add to My Manuals
Save this manual to your list of manuals |
Page 53 highlights
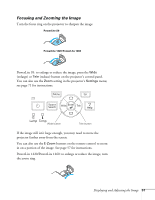
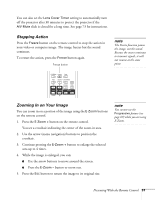
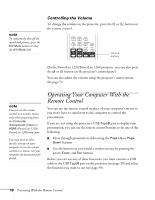
Resizing Video Images You can resize your images by changing the aspect (width to height) ratio (depending on your input signal). Press the Aspect button on the remote control. Press the Aspect button repeatedly to cycle through the available options. Aspect button note You cannot change the aspect ratio when displaying from a computer using the USB TypeB port or from a USB device using the USB source on the PowerLite 1220/ PowerLite 1260. Select from one of these Aspect options: PowerLite S9/PowerLite 1220 ■ Normal (for images sent through the Computer (Component Video) port only): Displays images using the full projection area and maintains the aspect ratio of the image. Choose this setting to automatically resize the image and make the best use of the display area. ■ Auto (HDMI images on PowerLite 1220 only): Automatically sets the aspect ratio according to the input signal. Choose this setting to project an HDMI image in the best aspect ratio. ■ 4:3: Displays images using the full projection area at an aspect ratio of 4:3. ■ 16:9: Converts the aspect ratio of the image to 16:9. 4:3 ratio images are elongated horizontally to fit. Displaying and Adjusting the Image 53
-
 1
1 -
2
-
3
-
4
-
5
-
6
-
7
-
8
-
9
-
10
-
11
-
12
-
13
-
14
-
15
-
16
-
17
-
18
-
19
-
20
-
21
-
22
-
23
-
24
-
25
-
26
-
27
-
28
-
29
-
30
-
31
-
32
-
33
-
34
-
35
-
36
-
37
-
38
-
39
-
40
-
41
-
42
-
43
-
44
-
45
-
46
-
47
-
 48
48 -
 49
49 -
 50
50 -
 51
51 -
 52
52 -
 53
53 -
 54
54 -
 55
55 -
 56
56 -
 57
57 -
 58
58 -
59
-
60
-
61
-
62
-
63
-
64
-
65
-
66
-
67
-
68
-
69
-
70
-
71
-
72
-
73
-
74
-
75
-
76
-
77
-
78
-
79
-
80
-
81
-
82
-
83
-
84
-
85
-
86
-
87
-
88
-
89
-
90
-
91
-
92
-
93
-
94
-
95
-
96
-
97
-
98
-
99
-
100
-
101
-
102
-
103
-
104
-
105
-
106
-
107
-
108
-
109
-
110
-
111
-
112
-
113
-
114
-
115
-
116
-
117
-
118
-
119
-
120
-
121
-
122
-
123
-
124
-
125
-
126
 |
 |
