Epson R340 Product Information Guide - Page 10
Replacing an Ink Cartridge, Removing and Installing Ink Cartridges - stylus photo ink cartridges
 |
UPC - 010343855632
View all Epson R340 manuals
Add to My Manuals
Save this manual to your list of manuals |
Page 10 highlights
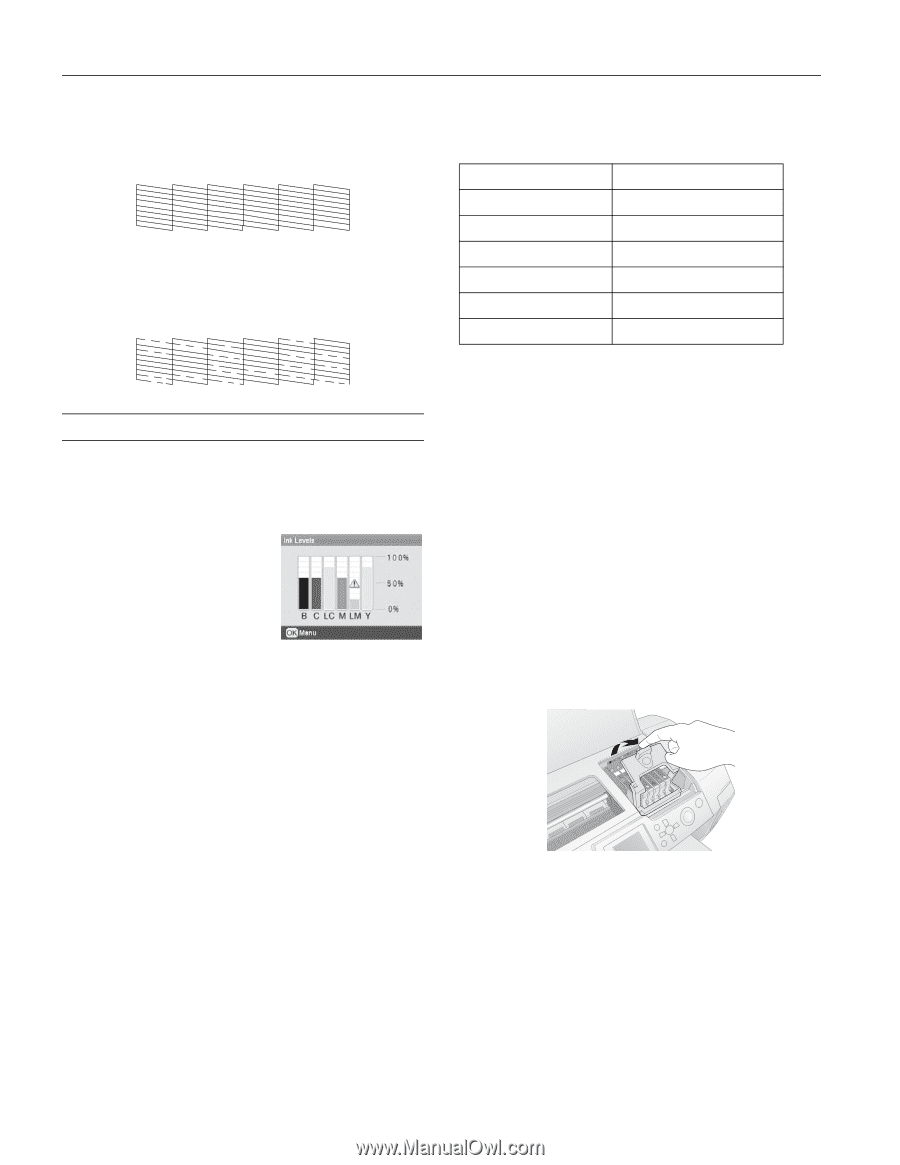
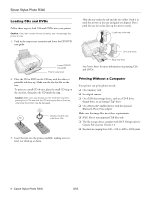
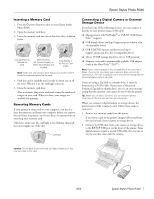
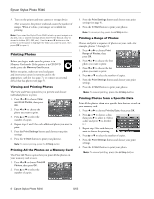
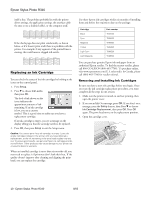
Epson Stylus Photo R340 itself is fine. The problem probably lies with the printer driver settings, the application settings, the interface cable (be sure to use a shielded cable), or the computer itself. If the check page does not print satisfactorily, as shown below, or if it doesn't print at all, there is a problem with the printer. For example, if any segment of the printed lines is missing, this could mean a clogged ink nozzle. Replacing an Ink Cartridge You can check the status of the ink cartridges by looking at the icons on the control panel. 1. Press Setup. 2. Press d to choose Ink Levels, then press OK. The level of ink shown on the icons indicates the approximate amount of ink remaining. If an ink cartridge is low, you see a caution symbol. This is a good time to make sure you have a replacement cartridge. If an ink cartridge is empty, you see a message on the display telling you that the cartridge needs to be replaced. 3. Press OK, then press Setup to exit the Setup menu. Caution: You cannot print if any ink cartridge is empty. Leave the empty cartridge installed in the printer until you have obtained a replacement, or the ink remaining in the print head nozzles may dry out. To ensure good results, use genuine Epson ink cartridges and do not refill them. Other products may cause damage to your printer not covered by Epson's warranty. When an installed cartridge is more than six months old, you may need to replace it if printouts don't look their best. If the quality doesn't improve after cleaning and aligning the print head, you can replace the cartridge. Use these Epson ink cartridges within six months of installing them and before the expiration date on the package: Cartridge Black Cyan Magenta Yellow Light Cyan Light Magenta Part number T048120 T048220 T048320 T048420 T048520 T048620 You can purchase genuine Epson ink and paper from an authorized Epson reseller. To find the nearest reseller, please call 800-GO-EPSON (800-463-7766). To purchase online, visit www.epsonstore.com (U.S. sales only). In Canada, please call (800) 463-7766 for reseller referral. Removing and Installing Ink Cartridges Be sure you have a new ink cartridge before you begin. Once you start the ink cartridge replacement procedure, you must complete all the steps in one session. 1. Make sure the printer is turned on and not printing, then open the printer cover. 2. If you see an Ink Out message, press OK. If you don't see a message, press the Setup button, then Press d to choose Ink Cartridge Replacement, then press OK. Press OK again. The print head moves to the replacement position. 3. Open the cartridge cover. 10 - Epson Stylus Photo R340 8/05
-
 1
1 -
2
-
3
-
4
-
 5
5 -
 6
6 -
 7
7 -
 8
8 -
 9
9 -
 10
10 -
 11
11 -
 12
12
 |
 |