Epson R340 Product Information Guide - Page 5
Borderless Photos, Loading Paper - stylus photo printer
 |
UPC - 010343855632
View all Epson R340 manuals
Add to My Manuals
Save this manual to your list of manuals |
Page 5 highlights
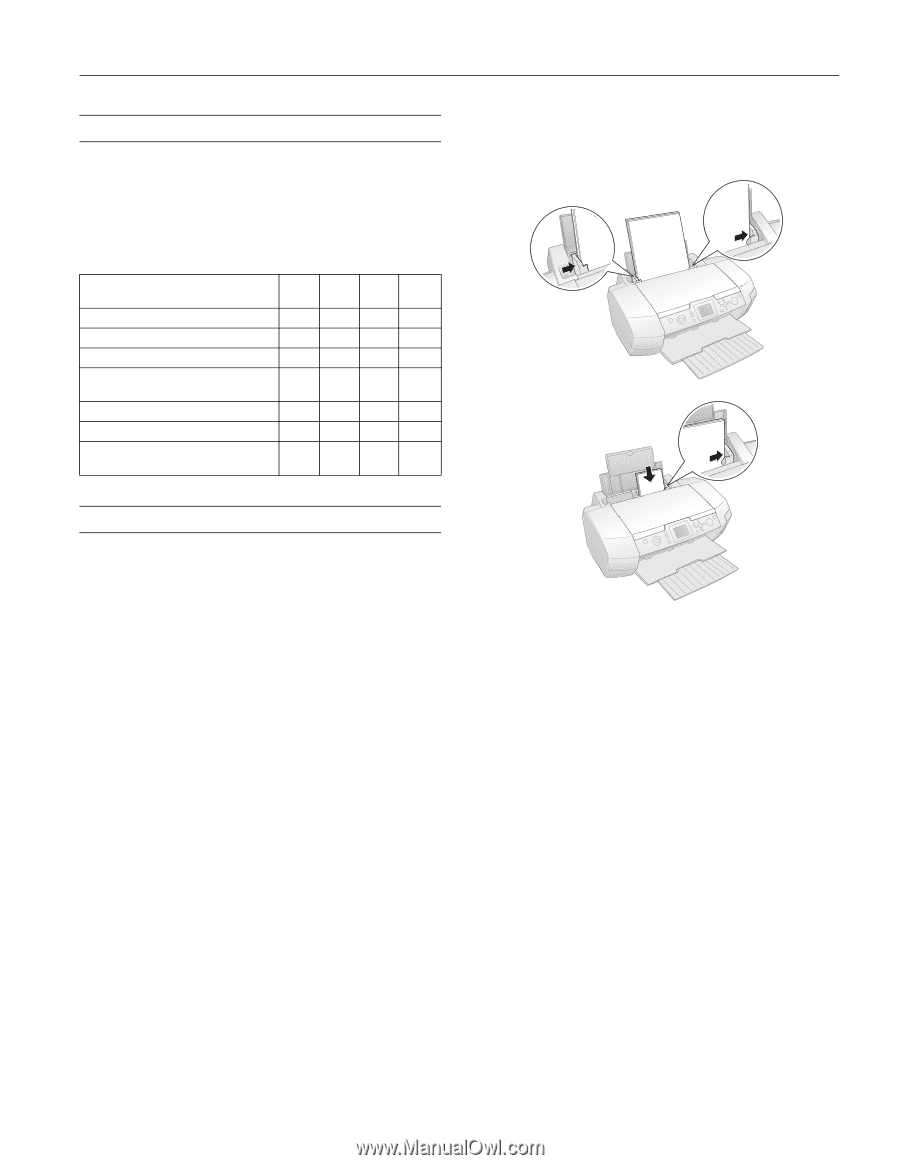
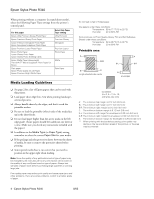
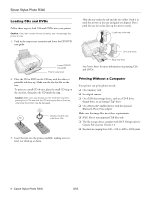
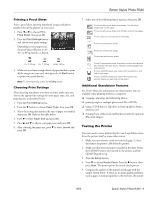
Epson Stylus Photo R340 Borderless Photos BorderFree™ printing is available for a variety of paper types and sizes, whether you're printing from your computer or in stand-alone mode. When printing from your computer, BorderFree printing supports the following paper types and sizes: Paper name Epson Photo Paper Epson Glossy Photo Paper Epson Premium Glossy Photo Paper Epson Premium Semigloss Photo Paper Epson Premium Luster Photo Paper Epson Matte Paper Heavyweight Epson Ultra Premium Glossy Photo Paper Letter size 4 × 6 Yes No Yes Yes Yes Yes Yes No 5 × 7 No No Yes No 8 × 10 No No Yes No Yes No No No Yes No No Yes Yes Yes No No 3. Slide the left edge guide against the paper. Make sure it is snug, but not so tight that the paper is bent. (For letter-size paper, you may not need to move the edge guide over.) Letter Loading Paper 1. Open the paper support and raise the extension. 2. Place your paper short edge first against the right edge of the feeder, under the tab, with the printable (whiter or glossier) side up. If you are loading multiple sheets, fan the stack of paper before loading it to prevent paper jams. Note: Don't load paper above the arrow mark inside the left edge guide. Some special papers can be loaded only one sheet at a time. See your on-screen User's Guide for details. 4 × 6 4. Open the output tray and pull out the extension. You should also follow these guidelines: ❏ Always load the short edge first, even when you're printing landscape-oriented pictures. ❏ When using special papers, check the paper package for additional instructions. Some papers require using a support sheet included in the package. Note: Always keep unused paper in the original package and store it flat to prevent curling. For instructions on loading special papers and envelopes in the printer, see your on-screen User's Guide. 8/05 Epson Stylus Photo R340 - 5
-
 1
1 -
 2
2 -
 3
3 -
 4
4 -
 5
5 -
 6
6 -
 7
7 -
 8
8 -
 9
9 -
 10
10 -
 11
11 -
12
 |
 |