Epson RX500 Product Information Guide - Page 6
Changing Copy Settings, EPSON Stylus Photo RX500 - scan
 |
UPC - 010343848467
View all Epson RX500 manuals
Add to My Manuals
Save this manual to your list of manuals |
Page 6 highlights
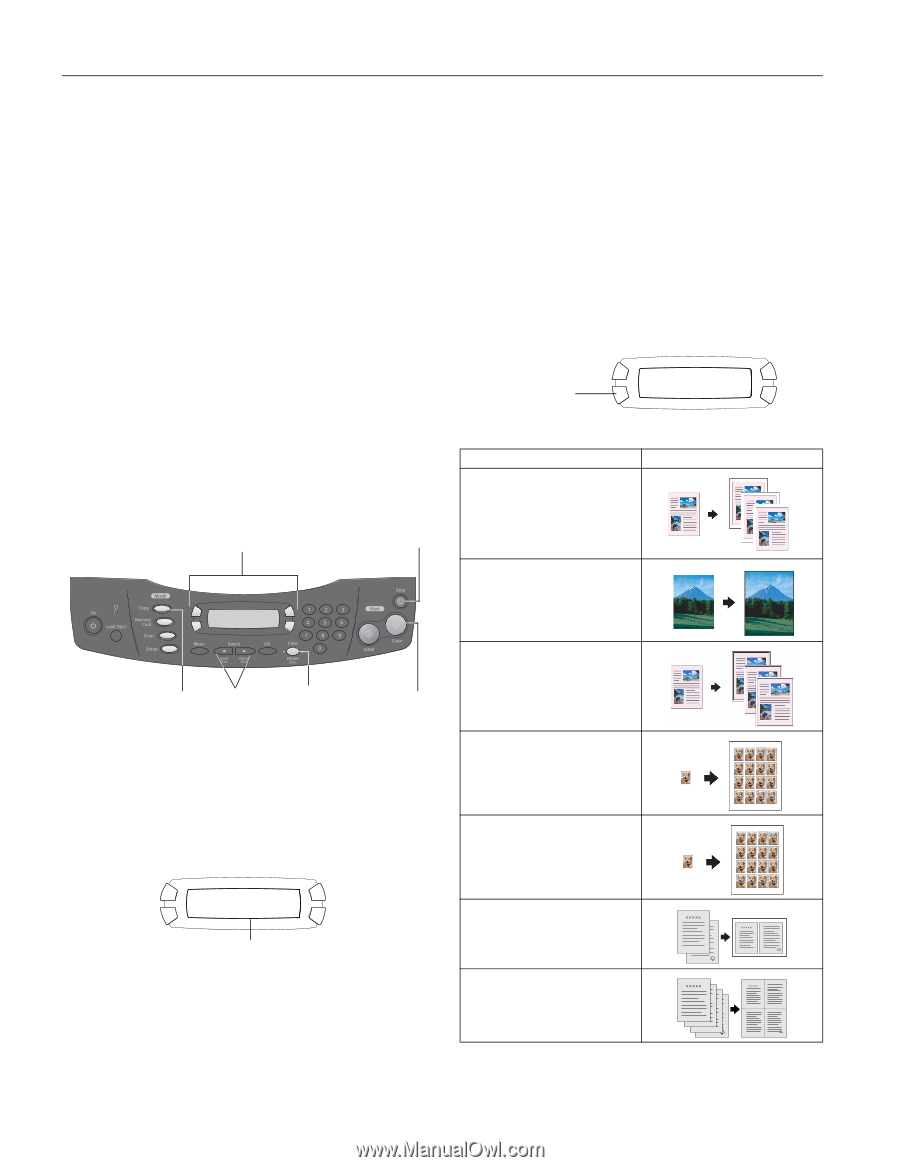
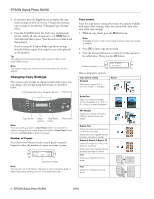
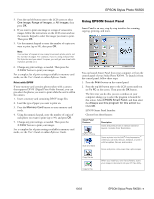
EPSON Stylus Photo RX500 3. If necessary, press the Copy button to display the copy mode settings on the LCD screen. Change any necessary copy settings, as described in "Changing Copy Settings" below. 4. Press the x Color button (for both color and grayscale photos, and for all color documents) or x B&W button (for black and white copies). Your document is scanned and then printed. If you're using the 2-up or 4-up copy layout settings described below, repeat these steps for your other photo(s) or document(s). Tip: Your grayscale photos look better when you print them using the x Color button Note: Your copied image size may not be the exact same size as your original. Changing Copy Settings The current copy settings are shown on the LCD screen. You can change copy settings using the buttons, as described below. LCD screen and menu navigation buttons Stop button Copy button Select Clear/Reset Color button buttons button Note: To clear a setting, press the Clear/Reset button. To clear all the setting changes you've made, press and hold the Clear/Reset button until you see Resetting on the LCD screen. Number of Copies Press one or two buttons on the control panel's numeric keypad to select the number of copies you want to print. Glossy 100% Photo 01 LTR Number of copies Note: You can print up to 99 copies. However, if you're using the 2-up or 4-up Copy Layout setting, you can only select one copy. Copy Layout Since the copy layout setting determines the options available with many other settings, select this option first, then select your other copy settings. 1. While in copy mode, press the Menu button. Note: The Copy button on the control panel is green when copy mode is enabled. 2. Press OK to enter copy layout mode. 3. Press the bottom left button to select one of the options in the table below. Then press the OK button. Press this button Copy Layout 1.Standard Choose from these options: Copy Layout setting Standard Copies your original with a 0.12-inch margin on all edges Result BorderFree Sizes your original as needed to fit to the edges of 4 × 6, 5 × 7, 8 × 10-inch, or letter-size paper* Min Margins Copies your original with only a 0.06-inch border around the edges* Repeat Auto Copies an image as many times as it will fit on one sheet Works best with originals that are business card-size or smaller Repeat-4, Repeat-9, Repeat-16 Copies an image four, nine, or 16 times on one sheet Works best with originals that are business card-size or smaller 2-up Copies two originals onto one sheet 4-up Copies four originals onto one sheet 6 - EPSON Stylus Photo RX500 10/03
-
 1
1 -
 2
2 -
 3
3 -
 4
4 -
 5
5 -
 6
6 -
 7
7 -
 8
8 -
 9
9 -
 10
10 -
 11
11 -
 12
12 -
13
-
14
 |
 |