Epson Stylus C80WN Product Support Bulletin(s) - Page 13
Bit Key 1, 128bit Key 1, Airport Admin Utility, Password, Verify
 |
View all Epson Stylus C80WN manuals
Add to My Manuals
Save this manual to your list of manuals |
Page 13 highlights
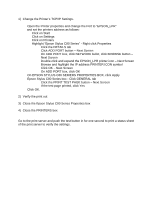
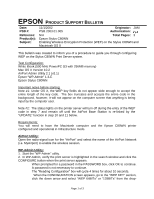
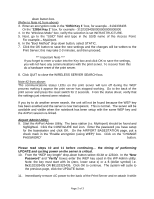
down button box. (Refer to Note #1 from above) 3. Enter an encryption code in the "64Bit Key 1" box, for example - 3132333435 Or the "128bit Key 1" box, for example - 31323334350000000000000000 4. In the "Wireless Mode" box, verify the selection is set INFRASTRUCTURE. 5. Next, go to the "SSID" field and type in the SSID name of the Access Point. For example - MyAirport. 6. In the "Boot Method" drop-down button, select STATIC. 7. Click the OK button to save the new settings and the changes will be written to the Print Server; this may take 2-3 minutes, and then proceed. *** Important Note *** If you forget to enter a value into the Key box and click OK to save the settings, you will not have any communications with the print server. To recover from this do a hardware reset of the print server. 8. Click QUIT to close the WIRELESS SERVER SEARCH box. Note #2 from above: The communications status LEDs on the print server will turn off during the WEP process making it appear the print server has stopped working. Go to the back of the print server and press the reset switch for 2 seconds. From the status sheet, verify that the settings just entered were retained. If you try to do another server search, the unit will not be found because the WEP key has been enabled and the server is now transparent. This is normal. The server will be available and visible when the notebook has been setup with the same WEP key and the AirPort session re-linked. Airport Admin Utility: 9. Start the AirPort Admin Utility. The base station (i.e. MyAirport) should be found and highlighted. Click the CONFIGURE tool icon. Enter the password you have setup for the basestation and click OK. On the AIRPORT BASESTATION page, put a check mark in the "Enable encryption (using WEP)" box. Click on the "CHANGE PASSWORD" button. Please read steps 10 and 11 before continuing... the timing of performing UPDATE and cycling power on the server is critical. 10. From the "WEP key length" drop-down button select 40-bit or 128-bit. In the "New Password" and "Verify" boxes enter the WEP key used in the WP-Admin utility. Note: the key must start with 0x (zero, lower case x) or a $ (dollar symbol) i.e. 0x3132333435 OR $3132323435. Click OK to continue. The system will cycle to the previous page, click the UPDATE button. 11. Immediately remove AC power to the back of the Print Server and re-attach it while Page 2 of 3
-
 1
1 -
2
-
3
-
4
-
5
-
6
-
7
-
 8
8 -
 9
9 -
 10
10 -
 11
11 -
 12
12 -
 13
13 -
 14
14 -
 15
15 -
 16
16 -
 17
17 -
 18
18 -
19
-
20
-
21
-
22
-
23
-
24
-
25
-
26
-
27
-
28
-
29
-
30
 |
 |