Epson Stylus C80WN Product Support Bulletin(s) - Page 23
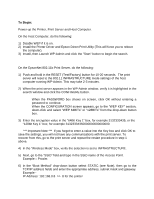
Click the CREATE KEYS MANUALLY bullet.
 |
View all Epson Stylus C80WN manuals
Add to My Manuals
Save this manual to your list of manuals |
Page 23 highlights
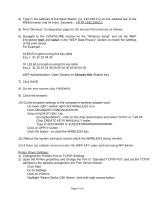
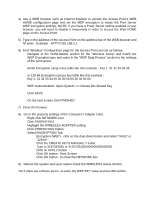
3) Go the property settings of the Computer's Adapter Card. • Right click the WIRELESS icon found in the System Tray by the lower right Taskbar. • Click ADVANCED CONFIGURATION. • On the CONFIGURATION tab, verify or enter the SSID name >> i.e. Proxim. • Click on the APPLY button if a change has been made. • Click the OK button to close the WIRELESS box. 4) Use a web browser such as Internet Explorer to access the Access Point HOME WEB configuration page and set the WEP encryption to match the Print Server WEP encryption settings. NOTE: If you have a Proxy Server setting enabled in your browser, you will need to disable it temporarily in order to access the HOME WEB page of the Access Point. 5) Type in the address of the Access Point (for example - HTTP://192.168.0.1) on the address bar of the web browser and press the Enter key. 6) Find the "Wireless" Configuration page for the Access Point and set as follows: • Navigate to the CONFIGURE section for the "Wireless Setup" and set the WEP Encryption type and value in the "WEP Data Privacy" section to match the settings of the print server. For Example 64 Bit Encryption using this key table for Key 1: 31 32 33 34 35 or 128 Bit Encryption using this key table for Key 1: 31 32 33 34 35 00 00 00 00 00 00 00 00 • WEP Authentication: Open System
-
 1
1 -
2
-
3
-
4
-
5
-
6
-
7
-
8
-
9
-
10
-
11
-
12
-
13
-
14
-
15
-
16
-
17
-
 18
18 -
 19
19 -
 20
20 -
 21
21 -
 22
22 -
 23
23 -
 24
24 -
 25
25 -
 26
26 -
 27
27 -
 28
28 -
29
-
30
 |
 |