Epson Stylus COLOR 480/480SX Printer Basics - Page 32
Replacing an Outdated Ink Cartridge, After you've installed
 |
View all Epson Stylus COLOR 480/480SX manuals
Add to My Manuals
Save this manual to your list of manuals |
Page 32 highlights
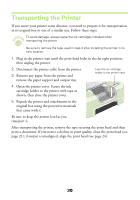
Replacing an Outdated Ink Cartridge If you need to replace an ink cartridge before you see a Status Monitor 3 message, follow the steps here to use the Ink Cartridge Replacement utility. Before you begin, make sure you've read the ink cartridge precautions on page 26. You can only access the Ink Cartridge Replacement utility from the Windows Printers utility, as described in the steps below. You can't run the utility from within a Windows application. 1. Make sure the printer is plugged in but not printing. 2. Click Start, point to Settings, then select Printers. 3. Right-click the EPSON Stylus COLOR 480 icon and click Properties from the menu that appears. You see this window: 4. Click the Utility tab, then click the Ink Cartridge Replacement button. 5. Follow the instructions on the screen to replace the ink cartridge. Click this button 6. After you've installed the cartridge, the printer begins charging ink for several minutes. Wait until you see a message telling you that charging is complete before resuming printing. Never unplug the printer while it's charging ink. 28
-
 1
1 -
2
-
3
-
4
-
5
-
6
-
7
-
8
-
9
-
10
-
11
-
12
-
13
-
14
-
15
-
16
-
17
-
18
-
19
-
20
-
21
-
22
-
23
-
24
-
25
-
26
-
 27
27 -
 28
28 -
 29
29 -
 30
30 -
 31
31 -
 32
32 -
 33
33 -
 34
34 -
 35
35 -
 36
36 -
 37
37 -
38
-
39
-
40
-
41
-
42
-
43
-
44
-
45
-
46
-
47
-
48
-
49
-
50
-
51
-
52
-
53
 |
 |
