Epson Stylus Pro 10000 - Photographic Dye Ink Product Information Guide - Page 11
Running a Nozzle Check, EPSON Stylus Pro 10000 - 11
 |
View all Epson Stylus Pro 10000 - Photographic Dye Ink manuals
Add to My Manuals
Save this manual to your list of manuals |
Page 11 highlights
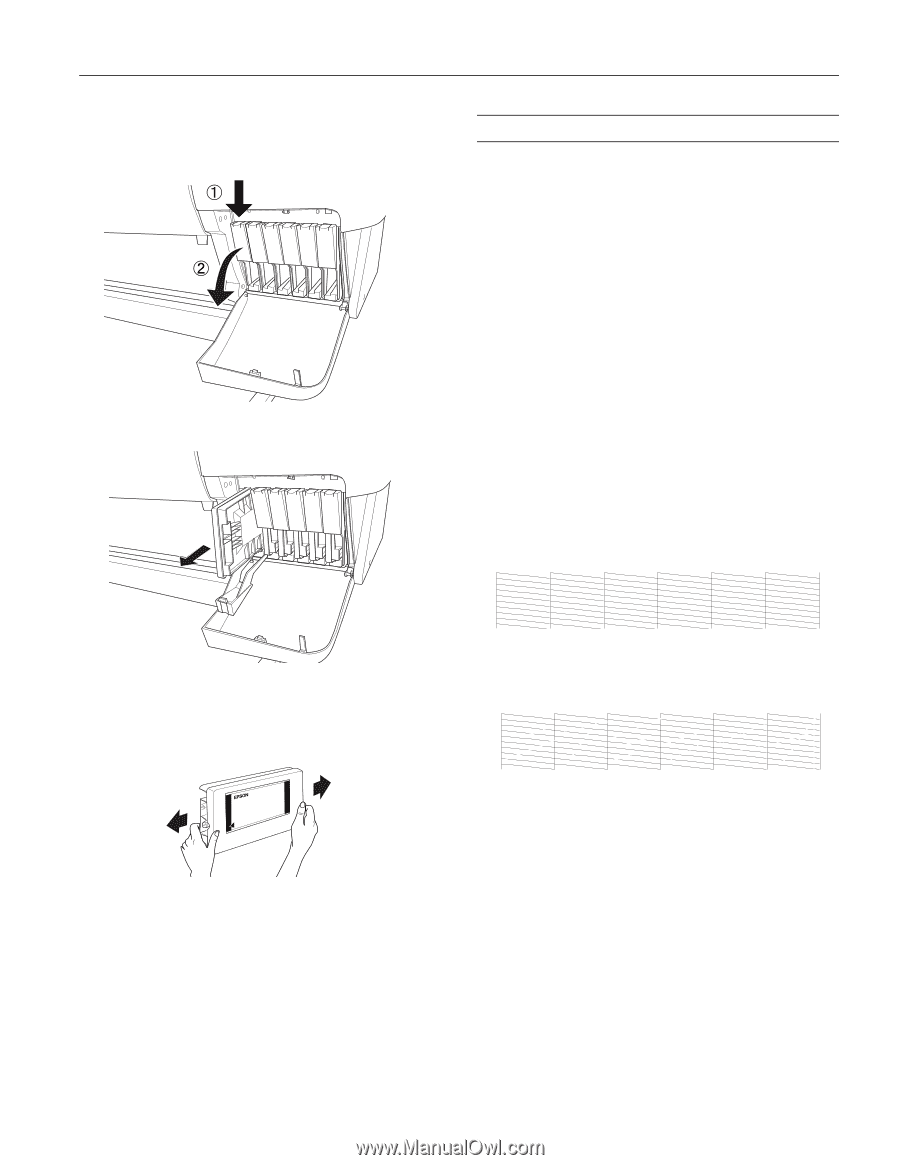
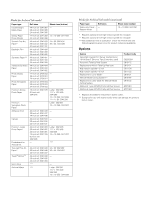
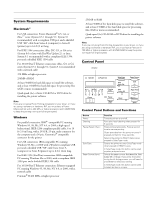
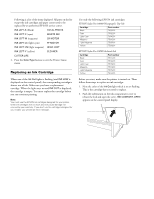
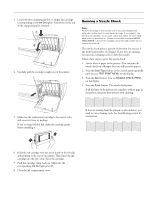
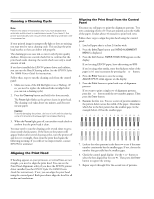
EPSON Stylus Pro 10000 3. Locate the slot containing the low or empty ink cartridge (corresponding to the Ink Out light). Press down on the top of the clamp and pull it forward. . 4. Carefully pull the cartridge straight out of the printer. Running a Nozzle Check Note: Perform the steps in this section only if you have disabled the automatic nozzle check in maintenance mode. If you haven't, the printer automatically runs a nozzle check and cleans the print head each time it is powered on. Unless you see the message NOZZLE CHECK ERROR in the printer's display, the print head nozzles do not need to be cleaned. The nozzle check prints a pattern of dots that lets you see if any print head nozzles are clogged. If any dots are missing, you can run a cleaning cycle to clear the nozzles. Follow these steps to print the nozzle check: 1. Load a sheet of paper in the printer. (You can print the nozzle check on roll paper, but you will use more paper.) 2. Press the SelecType button on the control panel repeatedly until you see TEST PRINT MENU on the display. 3. Press the Item button. You see NOZZLE CHECK=PRINT on the display. 4. Press the Enter button. The nozzle check prints. If all the lines on the pattern are complete, with no gaps in the pattern, the print head doesn't need cleaning. 5. Make sure the replacement cartridge is the correct color, and remove it from its package. If you're using Archival ink, shake the cartridge gently before installing it. If dots are missing from the pattern, as shown below, you need to run a cleaning cycle. See the following section for instructions. 6. Hold the ink cartridge with the arrow mark on the left side and pointing to the rear of the printer. Then insert the ink cartridge into the slot. Don't force the cartridge. 7. Push the cartridge clamp back up. Make sure the corresponding Ink Out light goes off. 8. Close the ink compartment cover. 5/01 EPSON Stylus Pro 10000 - 11
-
 1
1 -
2
-
3
-
4
-
5
-
 6
6 -
 7
7 -
 8
8 -
 9
9 -
 10
10 -
 11
11 -
 12
12 -
 13
13 -
 14
14 -
 15
15
 |
 |