Epson Stylus Pro 10000 - Photographic Dye Ink Product Information Guide - Page 14
Setting Up the Printer After Transporting It, Moving the Printer on the Stand
 |
View all Epson Stylus Pro 10000 - Photographic Dye Ink manuals
Add to My Manuals
Save this manual to your list of manuals |
Page 14 highlights
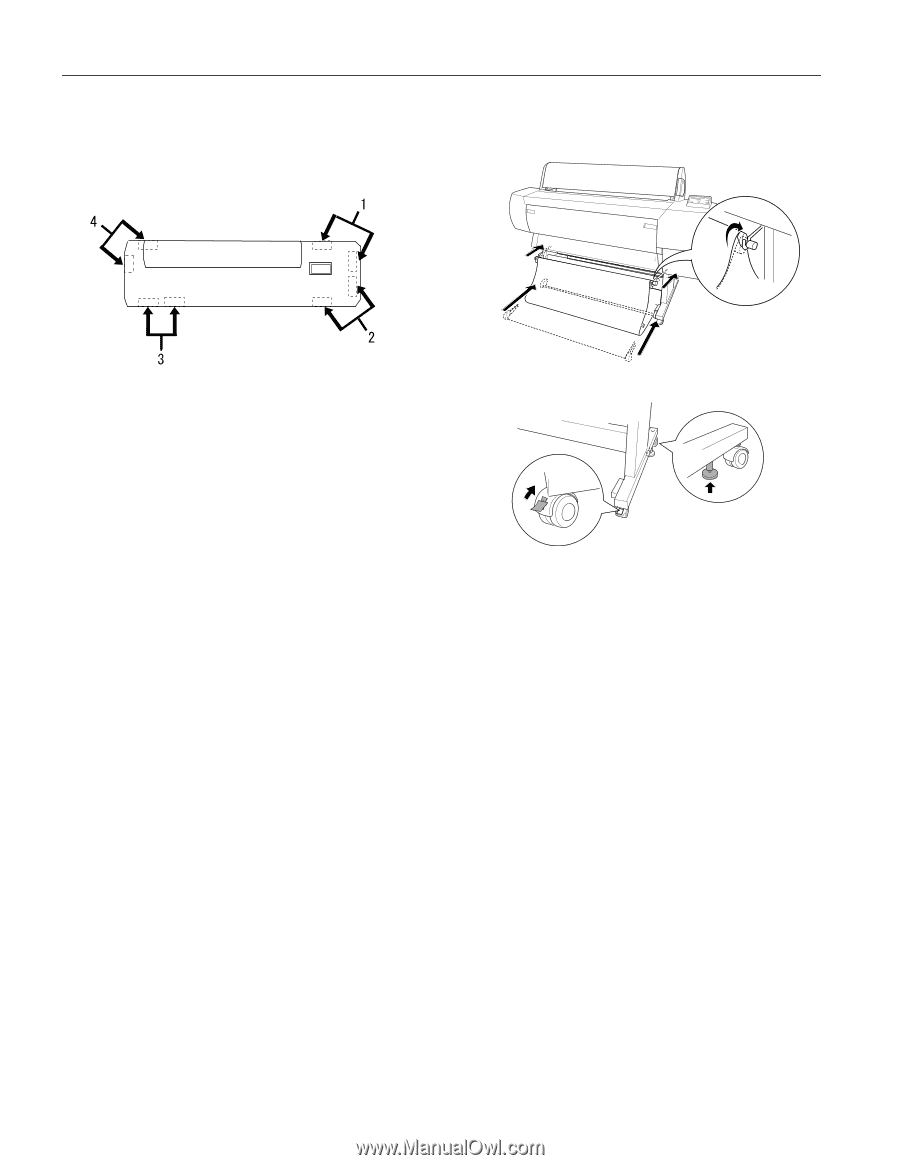
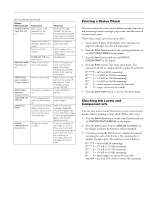
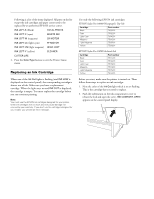
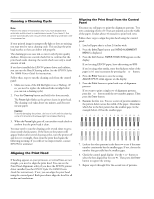
EPSON Stylus Pro 10000 6. Have four people lift the printer off of the stand, using the hand grips located at the four corners of the printer. Lift the back of the printer first, tilt it slightly to the front, then slide it back to remove it. 2. Fully insert the upper and lower hammock guides, then roll up the paper hammock. Warning: The printer weighs approximately 291 lb (132 kg). Always have four people lift it, using the hand grip areas illustrated above. 7. Keep the printer level while you move it. Setting Up the Printer After Transporting It Setting up the printer after transporting it is almost identical to setting it up for the first time. Whenever you set up the printer, see the Unpacking and Assembly Guide, and note the following points: ❏ Don't forget to remove any protective material (such as tape from the ink cartridge clamps). ❏ If the automatic nozzle check is enabled (default), the printer automatically runs a nozzle check and cleaning cycle when you turn it on. You may also need to realign the print head (see page 12) to ensure good print quality. Moving the Printer on the Stand When you want to move the printer a short distance, such as within the same building or facility, you can roll the printer on its casters. Follow these steps: Caution: Do not roll the printer on angled or uneven surfaces. 1. Make sure that the power cord, interface cable, roll paper spindles, and all paper are removed, and the roll paper cover and lower cover are closed. 3. Release the front casters and retract the stabilizer knobs. 4. Carefully roll the printer to its new location. Relock the casters and extend the stabilizer knobs after moving. The first time you start printing after moving the printer, you may need to realign the print head (see page 12) to ensure good print quality. If you see the message NOZZLE CHECK ERROR on the display, turn the printer off and then on again. The printer automatically runs a nozzle check and cleaning cycle whenever it is turned on. 14 - EPSON Stylus Pro 10000 5/01
-
 1
1 -
2
-
3
-
4
-
5
-
6
-
7
-
8
-
 9
9 -
 10
10 -
 11
11 -
 12
12 -
 13
13 -
 14
14 -
 15
15
 |
 |