Epson SureColor F6200 User Manual - Page 39
Using the Control Panel Menus, Accessing the Printer's Menus, Paper Menu Settings
 |
View all Epson SureColor F6200 manuals
Add to My Manuals
Save this manual to your list of manuals |
Page 39 highlights
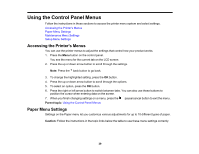
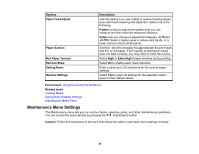
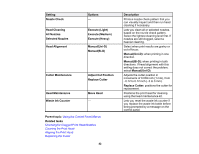
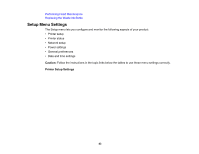
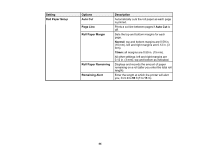
Using the Control Panel Menus Follow the instructions in these sections to access the printer menu system and select settings. Accessing the Printer's Menus Paper Menu Settings Maintenance Menu Settings Setup Menu Settings Accessing the Printer's Menus You can use the printer menus to adjust the settings that control how your product works. 1. Press the Menu button on the control panel. You see the menu for the current tab on the LCD screen. 2. Press the up or down arrow button to scroll through the settings. Note: Press the back button to go back. 3. To change the highlighted setting, press the OK button. 4. Press the up or down arrow button to scroll through the options. 5. To select an option, press the OK button. 6. Press the right or left arrow button to switch between tabs. You can also use these buttons to position the cursor when entering data on the screen. 7. When you finish changing settings on a menu, press the pause/cancel button to exit the menu. Parent topic: Using the Control Panel Menus Paper Menu Settings Settings on the Paper menu let you customize various adjustments for up to 10 different types of paper. Caution: Follow the instructions in the topic links below the table to use these menu settings correctly. 39
-
 1
1 -
2
-
3
-
4
-
5
-
6
-
7
-
8
-
9
-
10
-
11
-
12
-
13
-
14
-
15
-
16
-
17
-
18
-
19
-
20
-
21
-
22
-
23
-
24
-
25
-
26
-
27
-
28
-
29
-
30
-
31
-
32
-
33
-
 34
34 -
 35
35 -
 36
36 -
 37
37 -
 38
38 -
 39
39 -
 40
40 -
 41
41 -
 42
42 -
 43
43 -
 44
44 -
45
-
46
-
47
-
48
-
49
-
50
-
51
-
52
-
53
-
54
-
55
-
56
-
57
-
58
-
59
-
60
-
61
-
62
-
63
-
64
-
65
-
66
-
67
-
68
-
69
-
70
-
71
-
72
-
73
-
74
-
75
-
76
-
77
-
78
-
79
-
80
-
81
-
82
-
83
-
84
-
85
-
86
-
87
-
88
-
89
-
90
-
91
-
92
-
93
-
94
-
95
-
96
-
97
-
98
-
99
-
100
-
101
-
102
-
103
-
104
-
105
-
106
-
107
-
108
-
109
-
110
-
111
-
112
 |
 |