Epson TM-T88V-DT Technical Reference Guide - Page 114
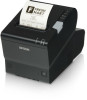
Hold the lower part of the connector cover, align the tabs on the upper
 |
View all Epson TM-T88V-DT manuals
Add to My Manuals
Save this manual to your list of manuals |
Page 114 highlights
3 If you use the product with the optional customer display, remove the Ushaped part from the connector cover. If you use the product without the optional customer display, keep the U-shaped part attached. U-shaped part 4 Align the tabs on the upper side of the connector cover with the notches on the main body, and push the front part of it to click onto the printer cover. 5 Hold the lower part of the connector cover, align the tabs on the upper side of it with the notches on the main body, and push the front part of connector cover to attach it. 114
-
 1
1 -
2
-
3
-
4
-
5
-
6
-
7
-
8
-
9
-
10
-
11
-
12
-
13
-
14
-
15
-
16
-
17
-
18
-
19
-
20
-
21
-
22
-
23
-
24
-
25
-
26
-
27
-
28
-
29
-
30
-
31
-
32
-
33
-
34
-
35
-
36
-
37
-
38
-
39
-
40
-
41
-
42
-
43
-
44
-
45
-
46
-
47
-
48
-
49
-
50
-
51
-
52
-
53
-
54
-
55
-
56
-
57
-
58
-
59
-
60
-
61
-
62
-
63
-
64
-
65
-
66
-
67
-
68
-
69
-
70
-
71
-
72
-
73
-
74
-
75
-
76
-
77
-
78
-
79
-
80
-
81
-
82
-
83
-
84
-
85
-
86
-
87
-
88
-
89
-
90
-
91
-
92
-
93
-
94
-
95
-
96
-
97
-
98
-
99
-
100
-
101
-
102
-
103
-
104
-
105
-
106
-
107
-
108
-
 109
109 -
 110
110 -
 111
111 -
 112
112 -
 113
113 -
 114
114 -
 115
115 -
 116
116 -
 117
117 -
 118
118 -
 119
119 -
120
-
121
-
122
-
123
-
124
-
125
-
126
-
127
-
128
-
129
-
130
-
131
-
132
-
133
-
134
-
135
-
136
-
137
-
138
-
139
-
140
-
141
-
142
-
143
-
144
-
145
-
146
-
147
-
148
-
149
-
150
-
151
-
152
-
153
-
154
-
155
-
156
-
157
-
158
-
159
-
160
-
161
-
162
-
163
-
164
-
165
-
166
-
167
-
168
-
169
-
170
-
171
-
172
-
173
-
174
-
175
-
176
-
177
-
178
-
179
-
180
-
181
-
182
-
183
-
184
-
185
-
186
-
187
-
188
-
189
-
190
-
191
-
192
-
193
-
194
-
195
-
196
-
197
-
198
-
199
-
200
-
201
-
202
-
203
-
204
-
205
-
206
-
207
-
208
-
209
-
210
-
211
-
212
-
213
-
214
-
215
-
216
-
217
-
218
-
219
-
220
-
221
-
222
-
223
-
224
-
225
-
226
-
227
-
228
-
229
-
230
-
231
-
232
-
233
-
234
-
235
-
236
-
237
-
238
-
239
-
240
 |
 |

114
3
If you use the product with the optional customer display, remove the U-
shaped part from the connector cover. If you use the product without
the optional customer display, keep the U-shaped part attached.
4
Align the tabs on the upper side of the connector cover with the
notches on the main body, and push the front part of it to click onto the
printer cover.
5
Hold the lower part of the connector cover, align the tabs on the upper
side of it with the notches on the main body, and push the front part of
connector cover to attach it.
U-shaped part