Epson TM-T88V-DT Technical Reference Guide - Page 116
Attaching the Power Button Cover
 |
View all Epson TM-T88V-DT manuals
Add to My Manuals
Save this manual to your list of manuals |
Page 116 highlights
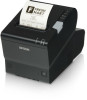
Attaching the Power Button Cover Attach the power button cover that comes with the product onto the power button to prevent accidental operation of the power button. Follow the steps below to attach the poert button cover. It is recommended to clean the area around the power button with a cloth moistened with alcohol before you attach the cover, 1 Open the power button cover. 2 Peel off the baking paper. 3 Attach the power button cover as shown in the illustration below. Align the left edge of the power button cover with the right edge of the printer reset button. Printer reset button Align the inside edge of the power button cover with the upper edge of the power button. Power button 116
-
 1
1 -
2
-
3
-
4
-
5
-
6
-
7
-
8
-
9
-
10
-
11
-
12
-
13
-
14
-
15
-
16
-
17
-
18
-
19
-
20
-
21
-
22
-
23
-
24
-
25
-
26
-
27
-
28
-
29
-
30
-
31
-
32
-
33
-
34
-
35
-
36
-
37
-
38
-
39
-
40
-
41
-
42
-
43
-
44
-
45
-
46
-
47
-
48
-
49
-
50
-
51
-
52
-
53
-
54
-
55
-
56
-
57
-
58
-
59
-
60
-
61
-
62
-
63
-
64
-
65
-
66
-
67
-
68
-
69
-
70
-
71
-
72
-
73
-
74
-
75
-
76
-
77
-
78
-
79
-
80
-
81
-
82
-
83
-
84
-
85
-
86
-
87
-
88
-
89
-
90
-
91
-
92
-
93
-
94
-
95
-
96
-
97
-
98
-
99
-
100
-
101
-
102
-
103
-
104
-
105
-
106
-
107
-
108
-
109
-
110
-
 111
111 -
 112
112 -
 113
113 -
 114
114 -
 115
115 -
 116
116 -
 117
117 -
 118
118 -
 119
119 -
 120
120 -
 121
121 -
122
-
123
-
124
-
125
-
126
-
127
-
128
-
129
-
130
-
131
-
132
-
133
-
134
-
135
-
136
-
137
-
138
-
139
-
140
-
141
-
142
-
143
-
144
-
145
-
146
-
147
-
148
-
149
-
150
-
151
-
152
-
153
-
154
-
155
-
156
-
157
-
158
-
159
-
160
-
161
-
162
-
163
-
164
-
165
-
166
-
167
-
168
-
169
-
170
-
171
-
172
-
173
-
174
-
175
-
176
-
177
-
178
-
179
-
180
-
181
-
182
-
183
-
184
-
185
-
186
-
187
-
188
-
189
-
190
-
191
-
192
-
193
-
194
-
195
-
196
-
197
-
198
-
199
-
200
-
201
-
202
-
203
-
204
-
205
-
206
-
207
-
208
-
209
-
210
-
211
-
212
-
213
-
214
-
215
-
216
-
217
-
218
-
219
-
220
-
221
-
222
-
223
-
224
-
225
-
226
-
227
-
228
-
229
-
230
-
231
-
232
-
233
-
234
-
235
-
236
-
237
-
238
-
239
-
240
 |
 |

116
Attaching the Power Button Cover
A
tt
ach
t
he power b
utt
o
n
cover
t
ha
t
comes w
it
h
t
he prod
u
c
t
o
nt
o
t
he power b
utt
o
n
t
o preve
nt
acc
i
de
nt
al opera
ti
o
n
of
t
he power b
utt
o
n
.
Follow
t
he s
t
eps below
t
o a
tt
ach
t
he poer
t
b
utt
o
n
cover.
1
Open the power button cover.
2
Peel off the baking paper.
3
Attach the power button cover as shown in the illustration below.
It is recommended to clean the area around the power button with a cloth moistened with
alcohol before you attach the cover,
Align the inside edge of the
power button cover with the
upper edge of the power button.
Align the left edge of the power
button cover with the right
edge of the printer reset button.
Printer reset button
Power button