Epson U200B Operation Manual - Page 10
Selecting the Place, Attaching the Paper Roll Near-End Detector (Option..., If you use this detector - printers
 |
View all Epson U200B manuals
Add to My Manuals
Save this manual to your list of manuals |
Page 10 highlights
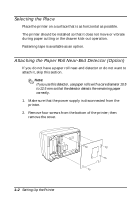
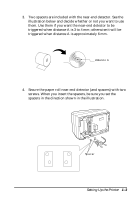
Selecting the Place Place the printer on a surface that is as horizontal as possible. The printer should be installed so that it does not move or vibrate during paper cutting or the drawer kick-out operation. Fastening tape is available as an option. Attaching the Paper Roll Near-End Detector (Option) If you do not have a paper roll near-end detector or do not want to attach it, skip this section. Note: If you use this detector, use paper rolls with a core diameter 10.5 to 12.5 mm so that the detector detects the remaining paper correctly. 1. Make sure that the power supply is disconnected from the printer. 2. Remove four screws from the bottom of the printer; then remove the cover. 1-2 Setting Up the Printer
-
 1
1 -
2
-
3
-
4
-
 5
5 -
 6
6 -
 7
7 -
 8
8 -
 9
9 -
 10
10 -
 11
11 -
 12
12 -
 13
13 -
 14
14 -
 15
15 -
16
-
17
-
18
-
19
-
20
-
21
-
22
-
23
-
24
-
25
-
26
-
27
-
28
-
29
-
30
-
31
-
32
-
33
-
34
-
35
-
36
-
37
-
38
-
39
-
40
-
41
-
42
-
43
-
44
-
45
-
46
-
47
-
48
 |
 |

1–2
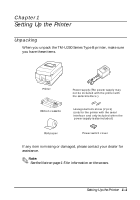
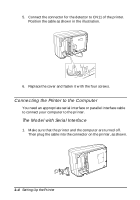
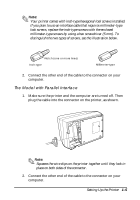
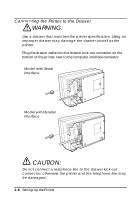
Setting Up the Printer
Selecting the Place
Place the printer on a surface that is as horizontal as possible.
The printer should be installed so that it does not move or vibrate
during paper cutting or the drawer kick-out operation.
Fastening tape is available as an option.
Attaching the Paper Roll Near-End Detector (Option)
If you do not have a paper roll near-end detector or do not want to
attach it, skip this section.
Note:
If you use this detector, use paper rolls with a core diameter 10.5
to 12.5 mm so that the detector detects the remaining paper
correctly.
1.
Make sure that the power supply is disconnected from the
printer.
2.
Remove four screws from the bottom of the printer; then
remove the cover.