Epson U200B Operation Manual - Page 12
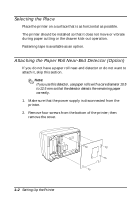
Connecting the Printer to the Computer, The Model with Serial Interface
 |
View all Epson U200B manuals
Add to My Manuals
Save this manual to your list of manuals |
Page 12 highlights
5. Connect the connector for the detector to CN11 of the printer. Position the cable as shown in the illustration. 6. Replace the cover and fasten it with the four screws. Connecting the Printer to the Computer You need an appropriate serial interface or parallel interface cable to connect your computer to the printer. The Model with Serial Interface 1. Make sure that the printer and the computer are turned off. Then plug the cable into the connector on the printer, as shown. 1-4 Setting Up the Printer
-
 1
1 -
2
-
3
-
4
-
5
-
6
-
 7
7 -
 8
8 -
 9
9 -
 10
10 -
 11
11 -
 12
12 -
 13
13 -
 14
14 -
 15
15 -
 16
16 -
 17
17 -
18
-
19
-
20
-
21
-
22
-
23
-
24
-
25
-
26
-
27
-
28
-
29
-
30
-
31
-
32
-
33
-
34
-
35
-
36
-
37
-
38
-
39
-
40
-
41
-
42
-
43
-
44
-
45
-
46
-
47
-
48
 |
 |

1–4
Setting Up the Printer
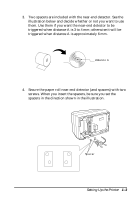
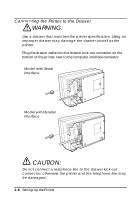
5.
Connect the connector for the detector to CN11 of the printer.
Position the cable as shown in the illustration.
6.
Replace the cover and fasten it with the four screws.
Connecting the Printer to the Computer
You need an appropriate serial interface or parallel interface cable
to connect your computer to the printer.
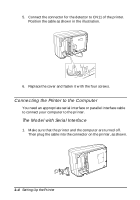
The Model with Serial Interface
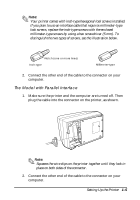
1.
Make sure that the printer and the computer are turned off.
Then plug the cable into the connector on the printer, as shown.