Epson V11H335120 User's Guide - Page 34
Connecting a Computer or Laptop, Connecting to the USB Port
 |
UPC - 010343874862
View all Epson V11H335120 manuals
Add to My Manuals
Save this manual to your list of manuals |
Page 34 highlights
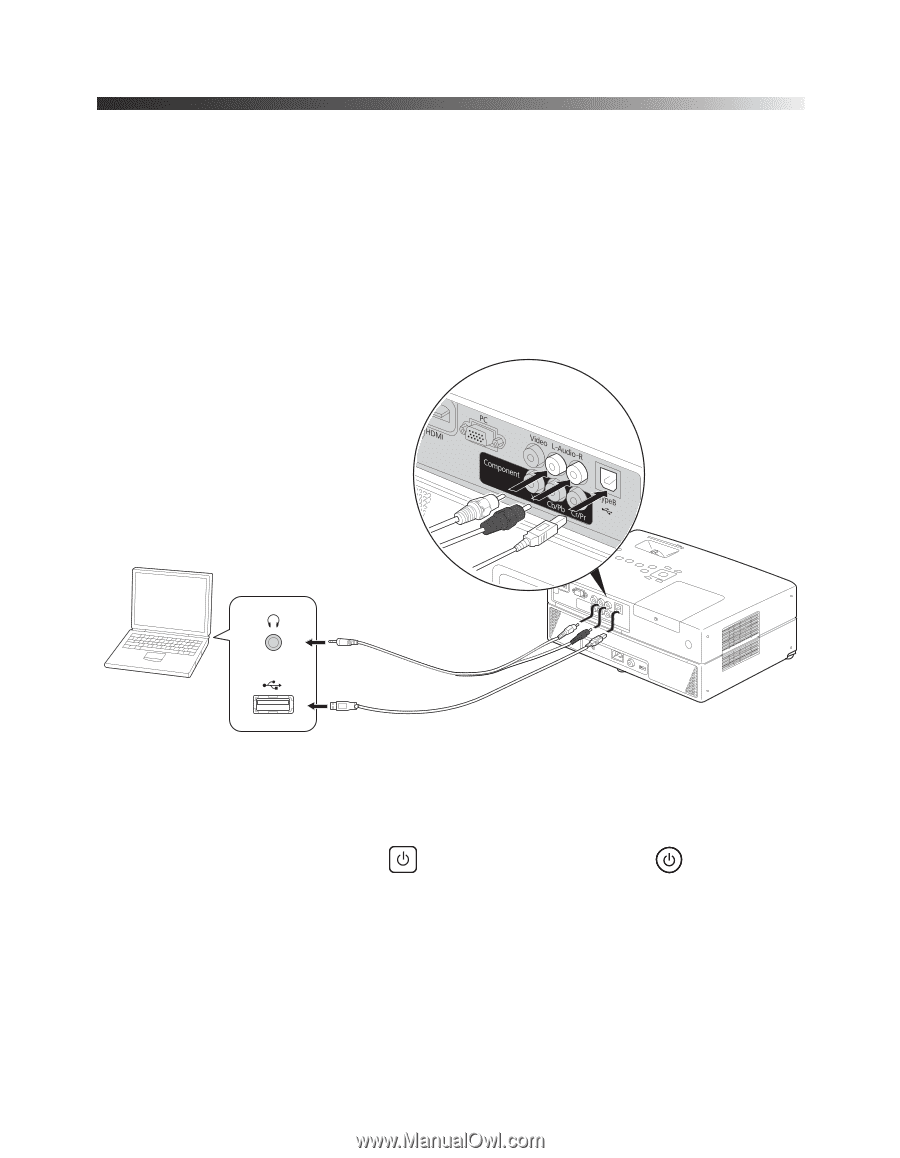
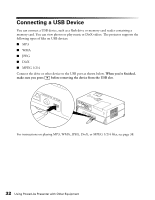
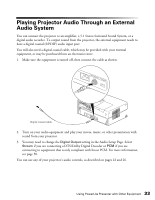
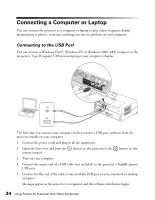
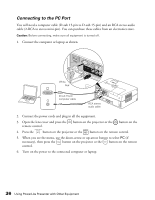
Connecting a Computer or Laptop You can connect the projector to a computer or laptop to play videos or games, display presentations or photos, or project anything you can see and hear on your computer. Connecting to the USB Port You can connect a Windows Vista®, Windows XP, or Windows 2000 (SP4) computer to the projector's Type B (square) USB port and project your computer's display. The first time you connect your computer to the projector's USB port, software from the projector installs on your computer. 1. Connect the power cords and plug in all the equipment. 2. Open the lens cover and press the button on the projector or the button on the remote control. 3. Turn on your computer. 4. Connect the square end of a USB cable (not included) to the projector's TypeB (square) USB port. 5. Connect the flat end of the cable to any available USB port on your notebook or desktop computer. Messages appear as the projector is recognized and the software installation begins. 34 Using PowerLite Presenter with Other Equipment
-
 1
1 -
2
-
3
-
4
-
5
-
6
-
7
-
8
-
9
-
10
-
11
-
12
-
13
-
14
-
15
-
16
-
17
-
18
-
19
-
20
-
21
-
22
-
23
-
24
-
25
-
26
-
27
-
28
-
 29
29 -
 30
30 -
 31
31 -
 32
32 -
 33
33 -
 34
34 -
 35
35 -
 36
36 -
 37
37 -
 38
38 -
 39
39 -
40
-
41
-
42
-
43
-
44
-
45
-
46
-
47
-
48
-
49
-
50
-
51
-
52
-
53
-
54
-
55
-
56
-
57
-
58
-
59
-
60
-
61
-
62
-
63
-
64
-
65
-
66
-
67
-
68
-
69
-
70
-
71
-
72
-
73
-
74
-
75
-
76
-
77
-
78
-
79
 |
 |