Epson XP-520 User Manual - Page 145
Uploading Scanned Images to Facebook, Scan your original using Easy Photo Scan.
 |
View all Epson XP-520 manuals
Add to My Manuals
Save this manual to your list of manuals |
Page 145 highlights
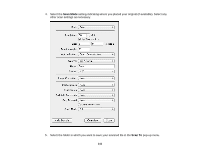
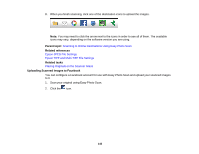
8. When you finish scanning, click one of the destination icons to upload the images. Note: You may need to click the arrow next to the icons in order to see all of them. The available icons may vary, depending on the software version you are using. Parent topic: Scanning to Online Destinations Using Easy Photo Scan Related references Epson JPEG File Settings Epson TIFF and Multi-TIFF File Settings Related tasks Placing Originals on the Scanner Glass Uploading Scanned Images to Facebook You can configure a Facebook account for use with Easy Photo Scan and upload your scanned images to it. 1. Scan your original using Easy Photo Scan. 2. Click the icon. 145
-
 1
1 -
2
-
3
-
4
-
5
-
6
-
7
-
8
-
9
-
10
-
11
-
12
-
13
-
14
-
15
-
16
-
17
-
18
-
19
-
20
-
21
-
22
-
23
-
24
-
25
-
26
-
27
-
28
-
29
-
30
-
31
-
32
-
33
-
34
-
35
-
36
-
37
-
38
-
39
-
40
-
41
-
42
-
43
-
44
-
45
-
46
-
47
-
48
-
49
-
50
-
51
-
52
-
53
-
54
-
55
-
56
-
57
-
58
-
59
-
60
-
61
-
62
-
63
-
64
-
65
-
66
-
67
-
68
-
69
-
70
-
71
-
72
-
73
-
74
-
75
-
76
-
77
-
78
-
79
-
80
-
81
-
82
-
83
-
84
-
85
-
86
-
87
-
88
-
89
-
90
-
91
-
92
-
93
-
94
-
95
-
96
-
97
-
98
-
99
-
100
-
101
-
102
-
103
-
104
-
105
-
106
-
107
-
108
-
109
-
110
-
111
-
112
-
113
-
114
-
115
-
116
-
117
-
118
-
119
-
120
-
121
-
122
-
123
-
124
-
125
-
126
-
127
-
128
-
129
-
130
-
131
-
132
-
133
-
134
-
135
-
136
-
137
-
138
-
139
-
 140
140 -
 141
141 -
 142
142 -
 143
143 -
 144
144 -
 145
145 -
 146
146 -
 147
147 -
 148
148 -
 149
149 -
 150
150 -
151
-
152
-
153
-
154
-
155
-
156
-
157
-
158
-
159
-
160
-
161
-
162
-
163
-
164
-
165
-
166
-
167
-
168
-
169
-
170
-
171
-
172
-
173
-
174
-
175
-
176
-
177
-
178
-
179
-
180
-
181
-
182
-
183
-
184
-
185
-
186
-
187
-
188
-
189
-
190
-
191
-
192
-
193
-
194
-
195
-
196
-
197
-
198
-
199
-
200
-
201
-
202
-
203
-
204
-
205
-
206
-
207
-
208
-
209
-
210
-
211
-
212
-
213
-
214
-
215
-
216
-
217
-
218
-
219
-
220
-
221
-
222
-
223
-
224
-
225
-
226
-
227
-
228
-
229
-
230
-
231
-
232
-
233
-
234
-
235
-
236
-
237
-
238
-
239
-
240
-
241
-
242
-
243
-
244
-
245
-
246
-
247
-
248
-
249
-
250
-
251
-
252
-
253
-
254
-
255
-
256
-
257
-
258
-
259
-
260
-
261
 |
 |

8.
When you finish scanning, click one of the destination icons to upload the images.
Note:
You may need to click the arrow next to the icons in order to see all of them. The available
icons may vary, depending on the software version you are using.
Parent topic:
Scanning to Online Destinations Using Easy Photo Scan
Related references
Epson JPEG File Settings
Epson TIFF and Multi-TIFF File Settings
Related tasks
Placing Originals on the Scanner Glass
Uploading Scanned Images to Facebook
You can configure a Facebook account for use with Easy Photo Scan and upload your scanned images
to it.
1.
Scan your original using Easy Photo Scan.
2.
Click the
icon.
145