Fantec MR-35DUS2 Datasheet - Page 3
Operation, The Hard Disk Installation
 |
View all Fantec MR-35DUS2 manuals
Add to My Manuals
Save this manual to your list of manuals |
Page 3 highlights
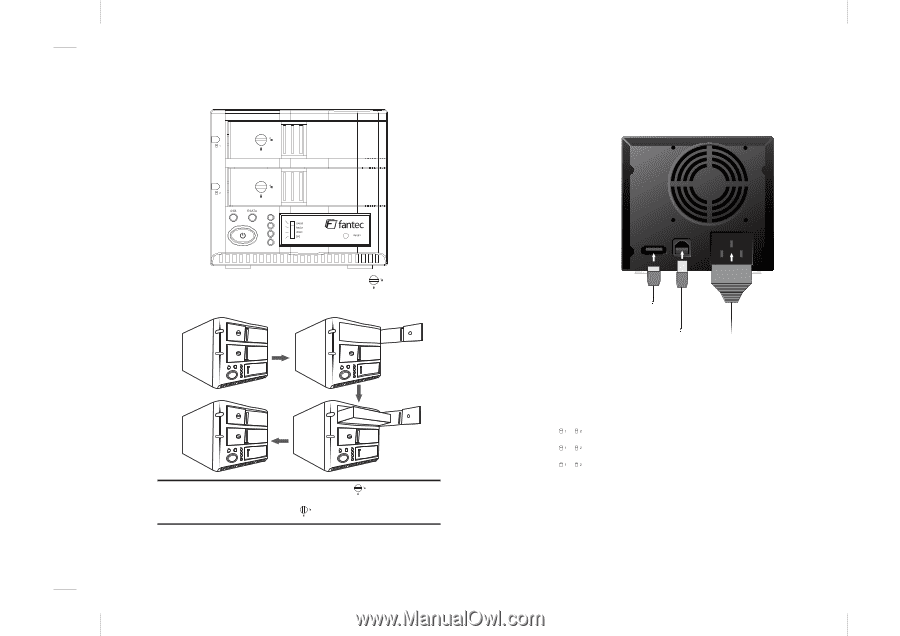
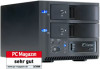
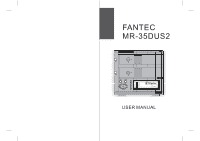
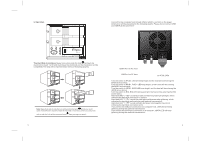
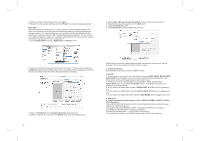
2. Operation Connect to the computer host through USB or eSATA, and turn on the power (Instruction will be presented in the following graph). Please do not connect USB and eSATA at the same time! The Hard Disk Installation:Sway from side to side the lock , and pull the doorknob to insert 1 or 2 hard disk.Close the doorknob and the installation will be completed (The step will be represented in terms of following graphs) Note:Sway from side to side the lock at the instructed point , which you could open the doorknob to install/ unload the hard disk. In Contrast, when you sway from side to side the lock at the instructed point , then you may not open it. 3 E-SATA USB AC 90V-240V eSATA Port to PC host USB Port to PC host to AC90-240V Turn the switch to RAID0, LED will keep bright and the host will be entering the RAID0 active status. Turn the switch to RAID1, RAID1 LED keep bright, and the host will be entering the RAID1 active status. Turn the switch to JBOD, JBOD LED keep bright, and the host will be entering the JBOD active status. Turn the switch to BIG, BIG LED will keep bright, the host will be entering the BIG active status. Hard disk LED " "/" " sends blue light and has long-lasting bright light, which indicates the hard disk connection is correct. Hard disk LED " "/" " sends the pink light and does not stop glittering, which indicates the hard disk performing wrong material transmission. Hard disk LED " "/" " sends red light and does not stop glittering, which indicates the hard disk connection error. If you select the USB port connection to a computer host, USB LED will keep glittering during the material transmission. If you select the eSATA port connection to a computer, eSATA LED will keep glittering during the material transmission. 4
-
 1
1 -
 2
2 -
 3
3 -
 4
4 -
 5
5 -
 6
6 -
 7
7 -
 8
8 -
 9
9 -
10
-
11
 |
 |