Fantec MR-35DUS2 Datasheet - Page 6
Before reconfiguring a volume, back up your data and delete
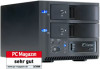 |
View all Fantec MR-35DUS2 manuals
Add to My Manuals
Save this manual to your list of manuals |
Page 6 highlights
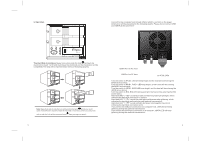
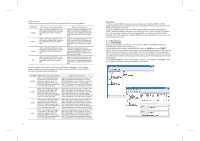
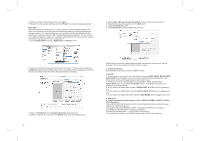
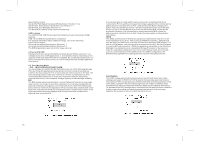
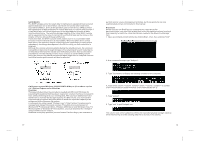
2.1.4 RAID1/SAFE The two drives were connected to the products HDD1 and HDD2 Connector; USB&Power Cable were connected; Opening the power switch, pulling MODE switch to RAID1 and press RESET switch, after a few seconds, the computer will automatically capture USB devices and increased 2 drives(If not drive there, then the hard disk drive management will re-zoning which format),At the moment you can Operate the disk. Re-zoning which drives formatted as follows(All information will be eliminated when Format hard drives); Click "My Computer", right-clicking pop-up menu, click Options "manage", popup computer management plan was pop-up as follow: 2.1.5 Partitioning Volumes This section explains how to partition volumes after configuring them in the SteelVine Manager GUI. You must partition volumes for the host computer's operating system before you can store data on the volumes. Refer to the operating system's documentation for further guidance. Partition a Volume MS Windows Important: Before reconfiguring a volume, back up your data and delete previously defined SteelVine Storage Reference Design partitions. If no hard disk drives are connected to the SteelVine Storage Processor, the SteelVine Processor device (the "Not Initialized" disk with no capacity allocated to it) will appear. Do not initialize or modify that device. 1. Right-click the My Computer icon on your desktop and select Manage from the pop-up window. 2. Select Disk Management under Storage to open the Windows Disk Manager. Click "Disks Management" plan: Right pop-up The additional disks (H :) and the additional disks (F :)' menus, choose "Delete Disk Segmentation". Click "Segmentation additional disks", followed by a clew to operate 9 10
-
 1
1 -
 2
2 -
 3
3 -
 4
4 -
 5
5 -
 6
6 -
 7
7 -
 8
8 -
 9
9 -
 10
10 -
 11
11
 |
 |
