Fantec MR-35DUS2 Datasheet - Page 8
SteelVine Processor disk 8.0 GB Config Disk Media will appear. Do not remove - review
 |
View all Fantec MR-35DUS2 manuals
Add to My Manuals
Save this manual to your list of manuals |
Page 8 highlights
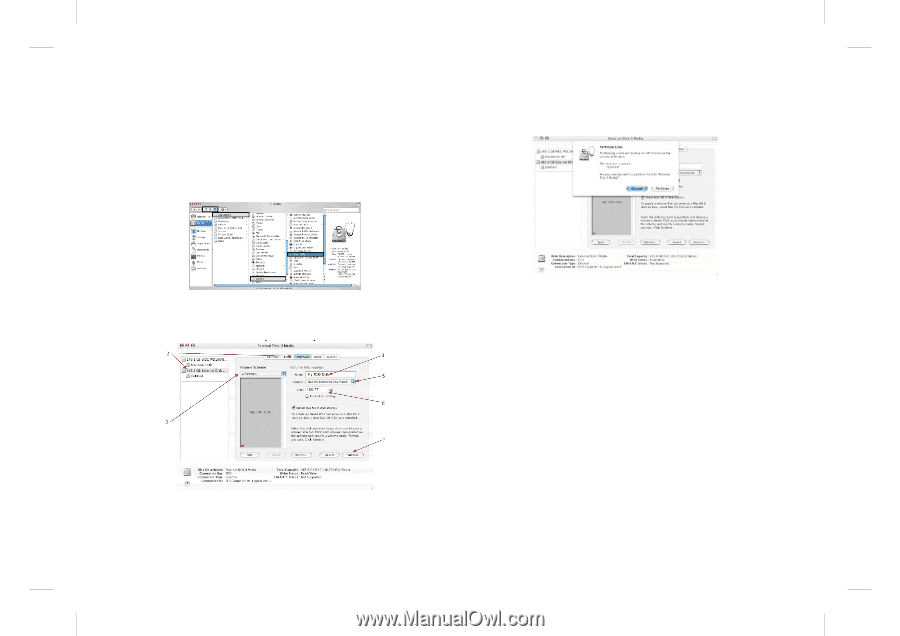
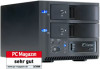
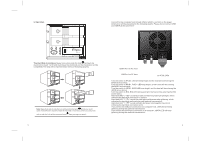
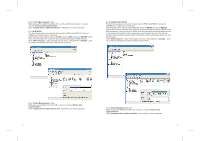
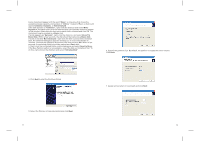
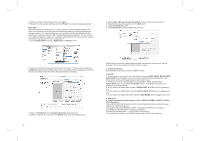
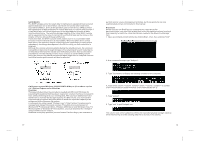
8. Name and format the partition and click Next. 9. Review the file system settings and click Finish to create the logical partition. Mac OS X Important: Before reconfiguring a volume, back up your data and drag the old drive to the trash to un-mount previously defined SteelVine Storage Reference Design partition. If no hard drives are connected to the Storage Appliance, the SteelVine Processor disk (8.0 GB Config Disk Media) will appear. Do not remove or modify that partition. After you configure and partition the new volumes, restore the backed-up data to the new configuration. 1. Launch Disk Utility from the Application > Utilities folder. 5. Select Mac OS Extended (journaled) from the Format drop-down list. 6. Specify the size of the partition in the Size field. 7. Click the Partition button. 8. Click Partition to acknowledge the warning. 2. Select a configured disk and click the Partition tab. This procedure illustrates the BIG Storage Policy configuration, which concatenates the capacity of all hard drives connected to the SteelVine Storage Reference Design. 3. Select 1 Partition from the Volume Scheme drop-down list. 4. Enter a name for the volume in the Name field (such as "My BIG disk".) 13 Disk Utility mounts the created partition and represents it with an icon on the desktop. The icon is labeled with the partition name. 2.2 eSATA interface the methods of operation with the USB interface. 3. NOTE : 1. If this product is in use for the first time or the mode (BIG, JBOD, RAID0/FAST, RAID1/SAFE) is changed, we must initialize and format the HDD before. (All information will be eliminated when format hard drives) 2. When you need to change different mode (BIG, JBOD, RAID0/FAST, RAID1/SAFE) you must press the RESET button, so that the enclosure can distinguish the exact mode. 3. If you require a faster data transfer, RAID0/FAST MODE will be suggested to use. 4. If you require a higher data security, RAID1/ SAFE MODE will be suggested to use. 5. If you require a bigger hard disk capacity, BIG MODE will be suggested to use. 4. Features 4.1 High speed external storage solution, USB2.0 480MB/s, eSATA 3.0Gb/s. SATA Features The FANTEC MR-35DUS2 provides the following Serial Advanced Technology Attachment (SATA) features: Automatic negotiation between SATA I (1.5Gbps) and SATA II (3.0 Gbps) Serial ATA 2.5 specification compliance (Gen2m) Serial ATA Port Multiplier 1.1 specification compliance For detailed information about SATA technology, refer to the following 14
-
 1
1 -
2
-
 3
3 -
 4
4 -
 5
5 -
 6
6 -
 7
7 -
 8
8 -
 9
9 -
 10
10 -
 11
11
 |
 |