Fisher and Paykel DD24DCTX7 BOOK INSTL DD24D Ph7 US CA EN (English) - Page 13
Fit The Supplied Toekick Panel, Secure To The Cabinetry On The Sides, Optionally Secure To
 |
View all Fisher and Paykel DD24DCTX7 manuals
Add to My Manuals
Save this manual to your list of manuals |
Page 13 highlights
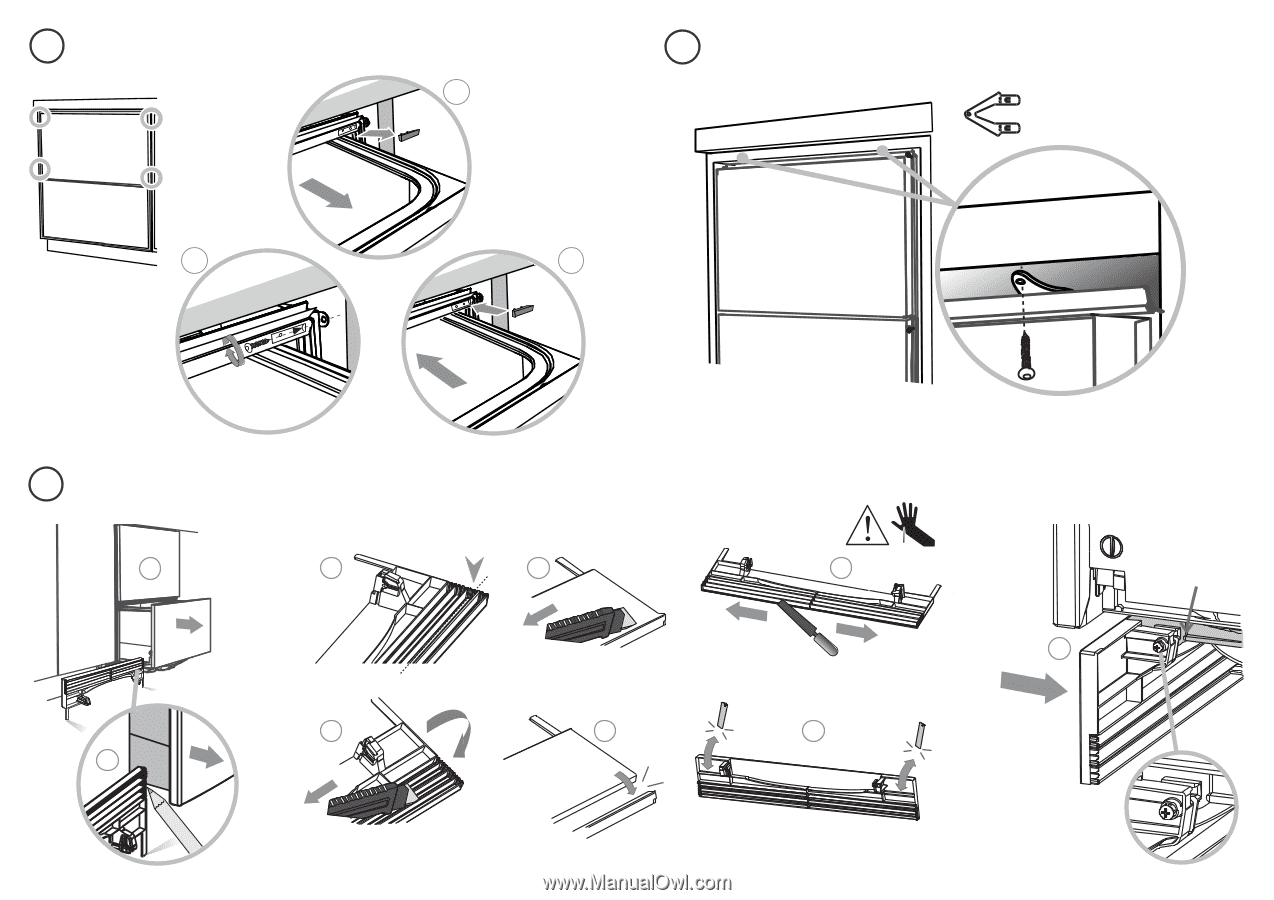
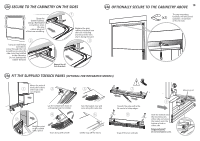
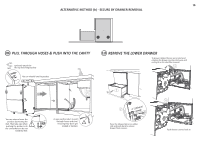
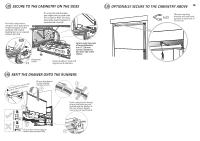
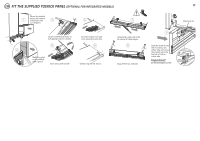
12a SECURE TO THE CABINETRY ON THE SIDES Open the drawer halfway. Using a flat-bladed screwdriver, prize the gray rubber plug out of the trim moulding. 2 Using a small Philips screwdriver, screw through the trim moulding, securing the side mounting bracket to the cabinetry. Do not damage the rubber trimseal. 1 Replace the gray rubber plug back into the trim moulding and ensure the trim seal is facing forward. 3 Repeat for all four brackets. 13a OPTIONALLY SECURE TO THE CABINETRY ABOVE 13 (x2) The top mounting brackets will only bend upwards a maximum of 3⁄8" (10 mm). 14a FIT THE SUPPLIED TOEKICK PANEL (OPTIONAL FOR INTEGRATED MODELS) Where the toekick 1 meets the bottom of the tub is the 3 cut-off point Lay the toekick face down on a chopping board or similiar 4 2 Mark this point on the toekick with a pencil 19 Score along with a knife 5 19 Turn the toekick over and score along the same line 6 Gently snap off the excess 7 Smooth the edge with a file. Be careful of sharp edges. 8 Snap off the two end tabs 9 Slide the toekick onto the mounting rails either side and screw the toekick onto the bottom of tub on either side. Important! Do not overtighten screw. Mounting rail
-
 1
1 -
2
-
3
-
4
-
5
-
6
-
7
-
 8
8 -
 9
9 -
 10
10 -
 11
11 -
 12
12 -
 13
13 -
 14
14 -
 15
15 -
 16
16 -
 17
17 -
 18
18 -
19
-
20
-
21
-
22
-
23
 |
 |