Foscam FI8918W QUICK INSTALLATION GUIDE - Page 21
WPS Wi-Fi Protected Set-up, If you fail to make a wireless connection
 |
View all Foscam FI8918W manuals
Add to My Manuals
Save this manual to your list of manuals |
Page 21 highlights
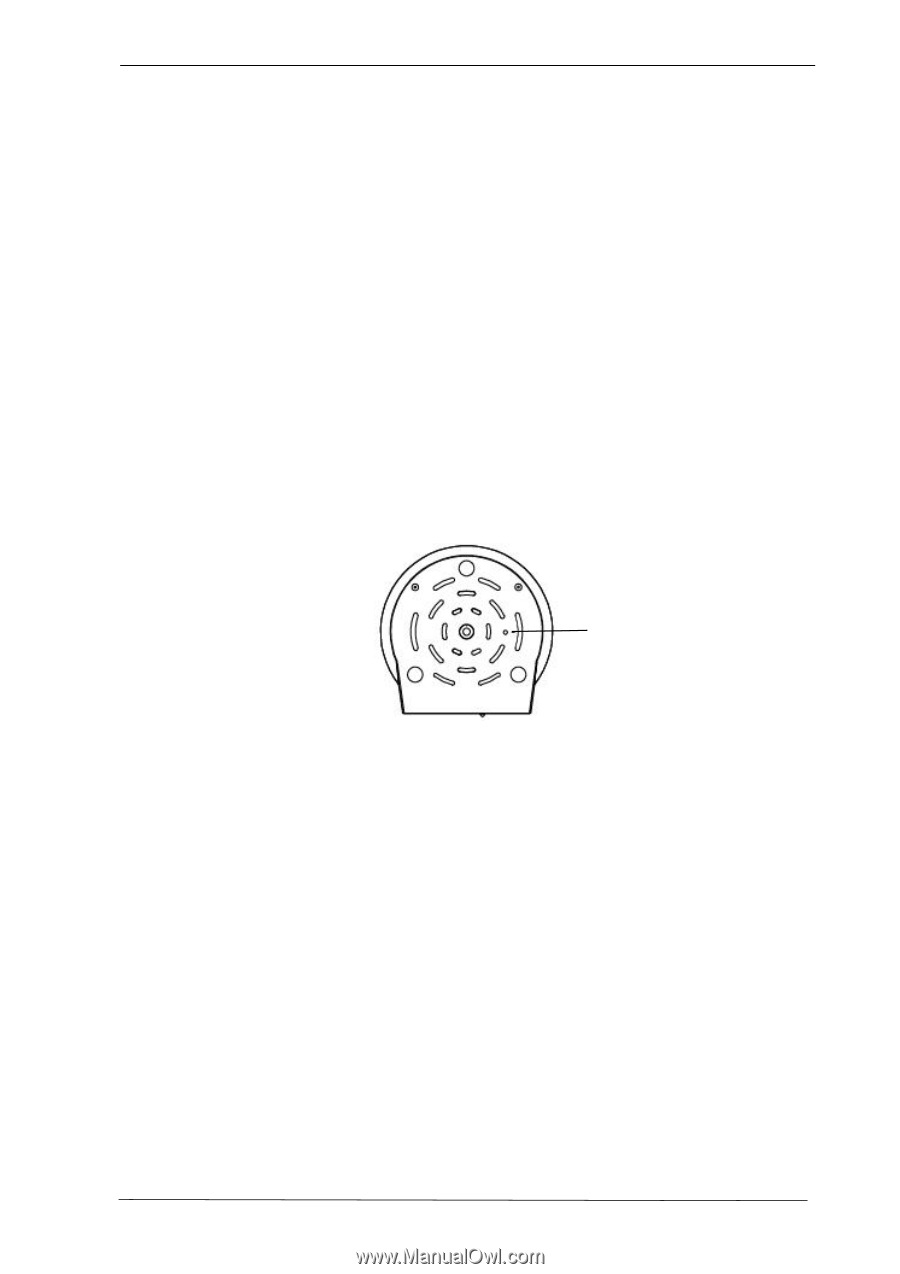
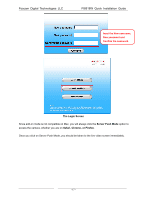
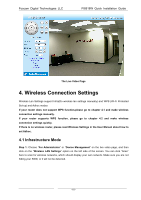
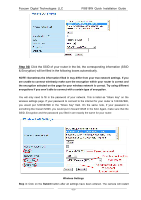
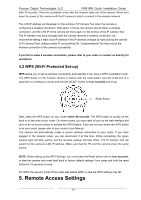
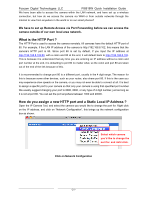
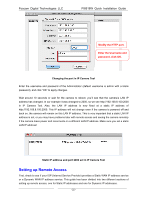
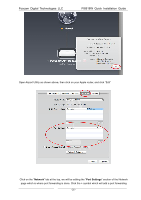
Foscam Digital Technologies LLC FI8918W Quick Installation Guide after 30 seconds. Once the countdown ends, take the network cable out of the camera. Never shut down the power of the camera until the IP camera is able to connect to the wireless network. The LAN IP address will disappear on the window of IP Camera Tool when the camera is configuring a wireless connection. Wait about 1 minute, the camera should obtain a wireless connection, and the LAN IP of the camera will show again on the window of the IP Camera Tool. The IP address may have changed after the camera receives a wireless connection; we recommend setting a static local IP address if this IP address changes by right clicking the camera in IP Camera Tools, setting a static IP, and pushing OK. Congratulations! You have set up the wireless connection of the camera successfully. If you fail to make a wireless connection, please refer to your seller or contact us directly for assistance. 4.2 WPS (Wi-Fi Protected Set-up) WPS allows you to set up wireless connectivity automatically if you have a WPS-compatible router. The WPS button on the Foscam camera is shared with the reset button. Use the small end of a paperclip or a toothpick to press and hold the RESET button for four seconds and let go. Reset Button Next, press the WPS button on your router within 60 seconds. The WPS button is usually on the back or on the side of your router. On some routers, you may need to log in to the web interface and click on an on-screen button to activate the WPS feature. If you are not sure where the WPS button is on your router, please refer to your router's User Manual. The camera will automatically create a secure wireless connection to your router. If you have plugged in the network cable, you can disconnect it at this time. While connecting, the green network light will blink quickly and the wireless settings will take effect. The IP Camera Tool will search for the camera's LAN IP address. Make sure that the PC and the camera share the same subnet. NOTE: When setting up the WPS Settings, you must press the Reset button only for four seconds, or else the camera may reset itself back to factory default settings if you press and hold the reset button for 10 seconds or more. For WPS, the security mode of the router can not be WEP, or else the WPS settings may fail. 5. Remote Access Settings - 20 -
-
 1
1 -
2
-
3
-
4
-
5
-
6
-
7
-
8
-
9
-
10
-
11
-
12
-
13
-
14
-
15
-
 16
16 -
 17
17 -
 18
18 -
 19
19 -
 20
20 -
 21
21 -
 22
22 -
 23
23 -
 24
24 -
 25
25 -
 26
26 -
27
-
28
-
29
 |
 |